Dashboard and items
Inventory tracks your agency's equipment: what you have, what state it is in, and where it is. Members see and update the same items in the app's Inventory module.
Dashboard
Where: InventoryDashboard
 12
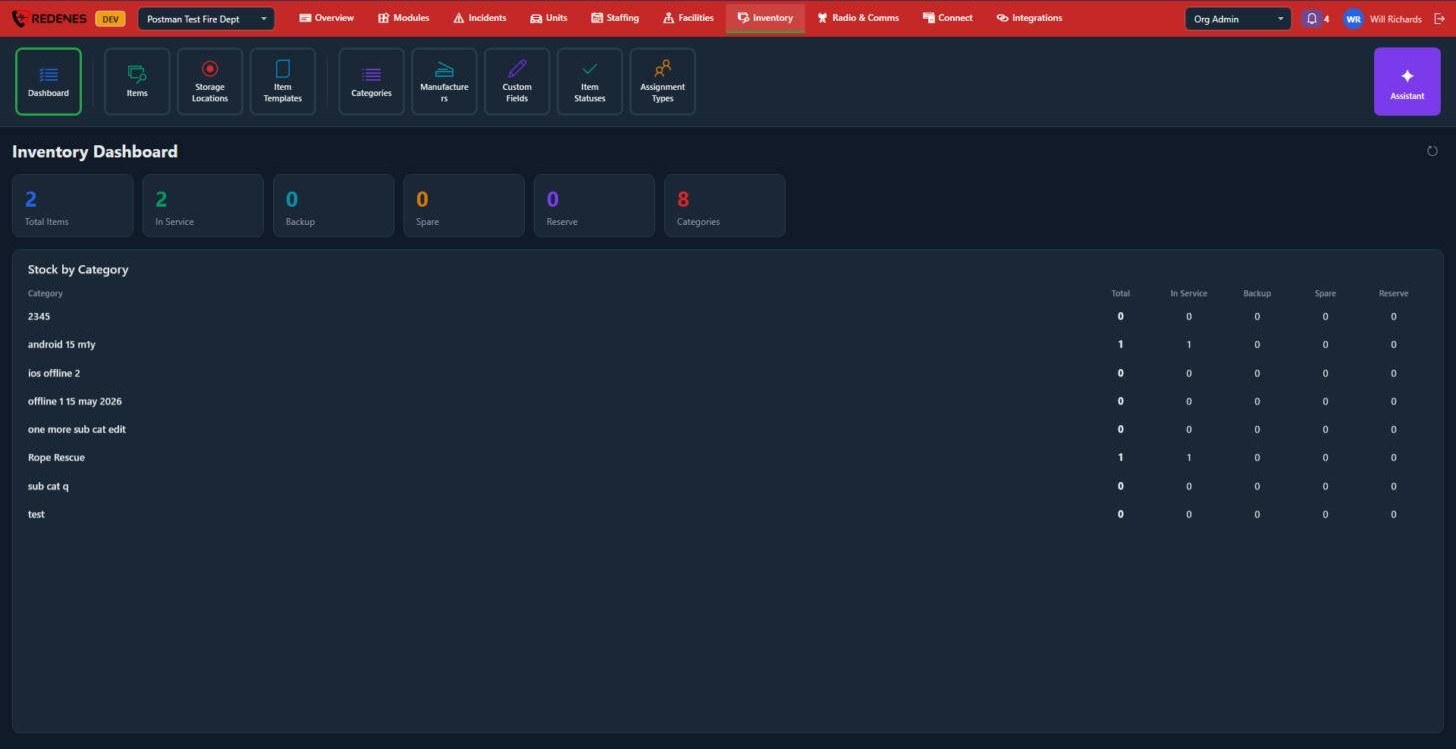
- The counters 1 show the total number of items, how many are In Service, how many are held as Backup, Spare or Reserve, and how many categories you have.
- Stock by Category 2 breaks the same numbers down per category, so you can see at a glance where you are short.
The dashboard is read-only. To change anything, go to Items.
Items
Where: InventoryItems
 12345
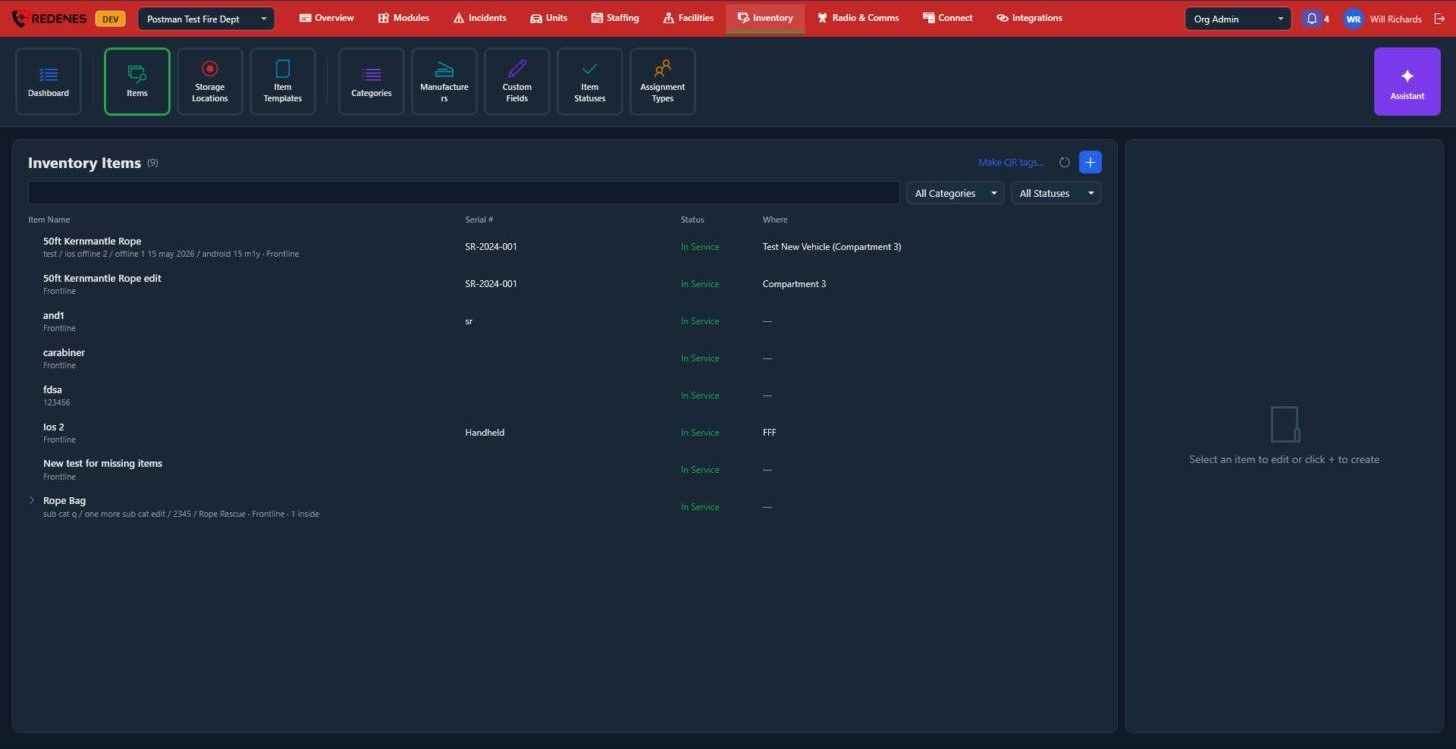
- Click + 1 to add an item. Start from an item template to fill in the category, manufacturer and model for you.
- Find an item 2 by typing part of its name or serial number, or filter by category or status.
- Make QR tags 3 prints a QR label for each item. Scanning a label in the app opens that item.
- An arrow beside an item 4 means it is a kit with other items inside (for example a rope bag). Click the arrow to see what is in it.
- Click an item to edit it in the panel on the right 5.
An item's panel
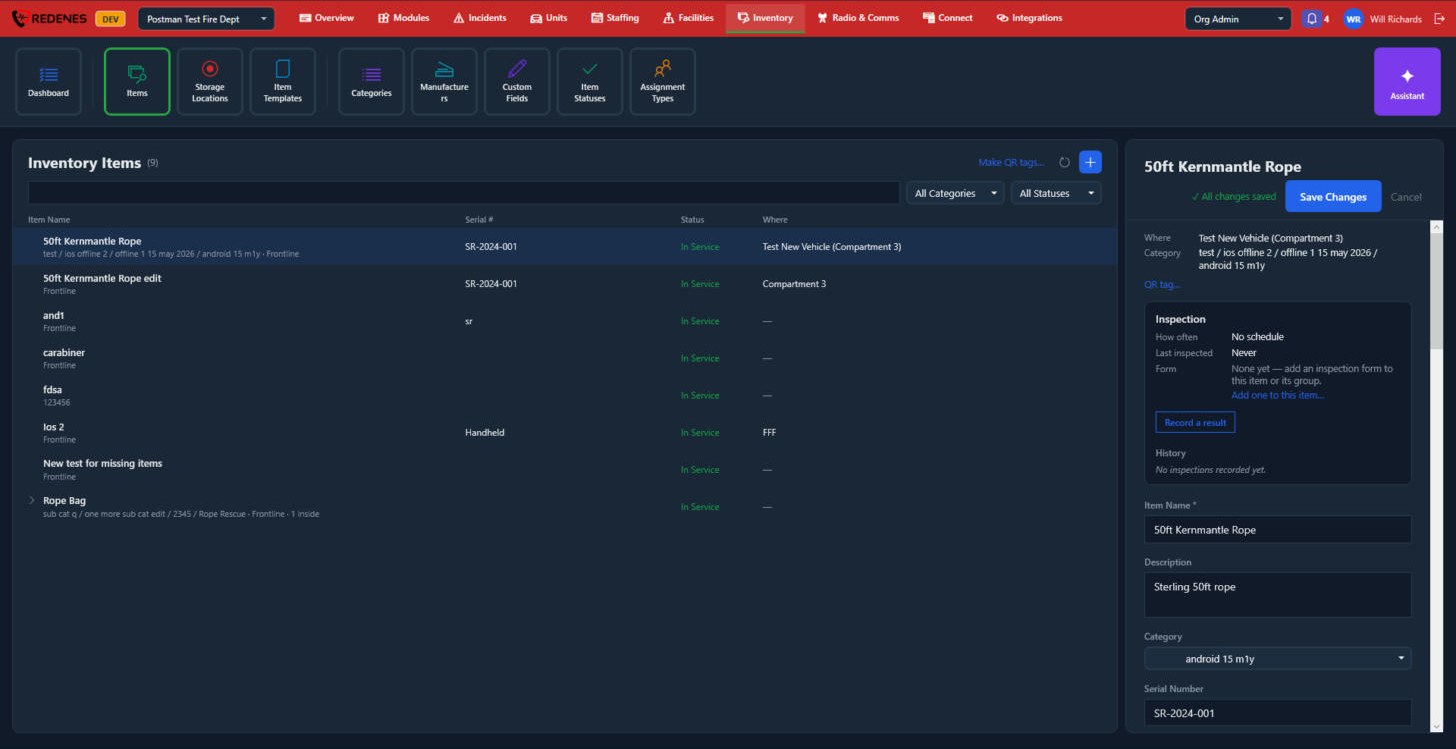
Click an item and it opens on the right. The panel is long, so scroll down inside it.
 1234
- Where, Category and QR tag 1: where the item is now, and its own QR code to print.
- Inspection 2: how often it is inspected, when it was last inspected and the form used. Record a result saves an inspection, and History lists the earlier ones.
- Item Name, Description, Category and Serial Number 3.
- Save Changes and Cancel 4 stay at the top while you scroll.
 1234
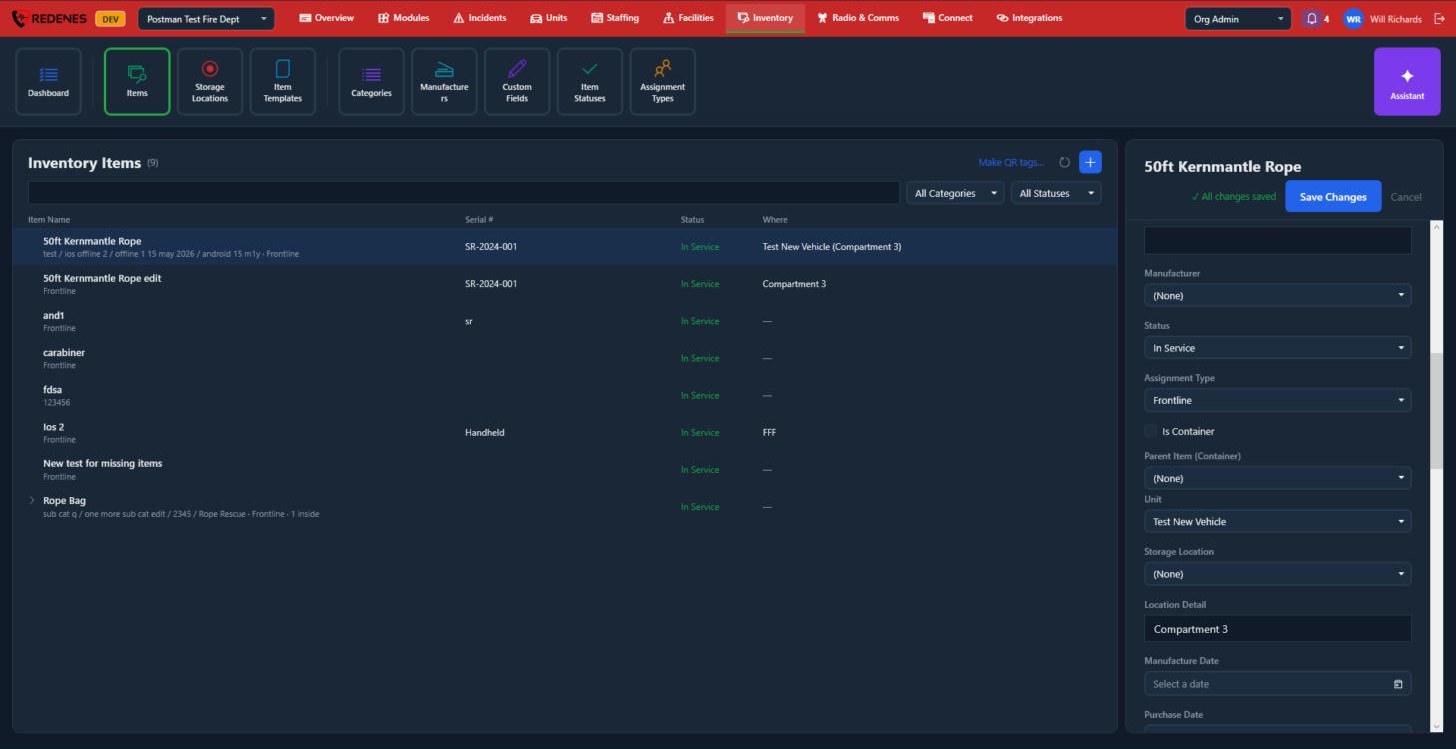
- Manufacturer, Status and Assignment Type 1.
- Is Container and Parent Item 2: tick Is Container for a bag or case that holds other items, or pick the container this item is inside. An item inside a container is wherever the container is, so leave its unit and storage location empty.
- Unit, Storage Location and Location Detail 3: the unit it is carried on or the place it is stored, and a detail such as Compartment 3.
- The dates 4: manufacture, purchase, in service, expiration and warranty expiration. Below them are the model number, cost, lifespan in months, the Inspection Schedule (inspect every so many weeks) and your custom fields.
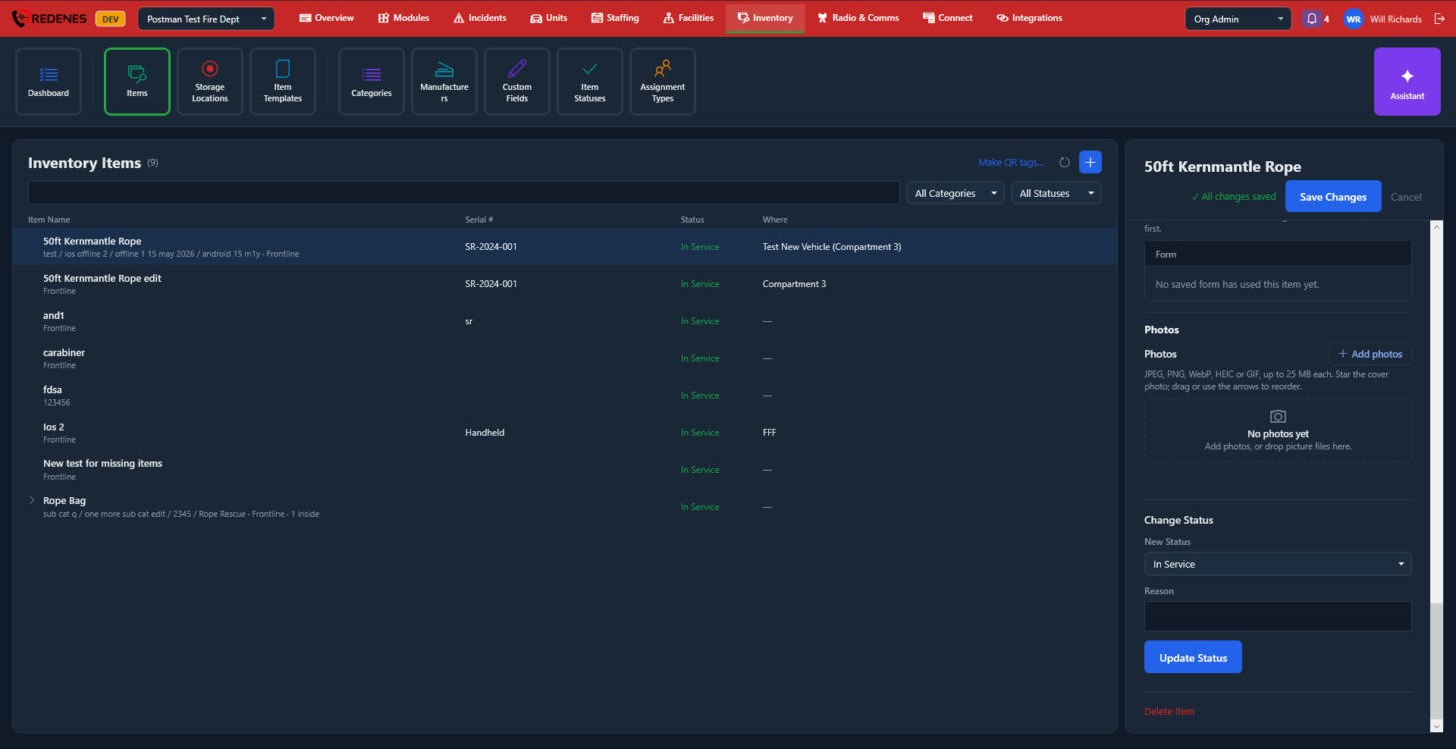 123
- Photos 1: add pictures of the item. Star the cover photo, and drag to reorder.
- Change Status 2: pick the new status, type a reason and click Update Status. This saves at once and keeps the reason in the item's history.
- Delete Item 3.
When you add a new item, Start from Template at the top fills in the form from an item template.
What an item holds
| Field | Meaning |
|---|---|
| Name and Serial # | What it is and which one it is. |
| Category | Where it sits in your category tree. |
| Status | Its condition: In Service, Out of Service, Maintenance, Missing and so on. |
| Assignment type | Its role: Frontline, Backup, Spare or Reserve. This drives the dashboard counters. |
| Where | The storage location or the unit compartment it is kept in. |
| Custom fields | Anything else your agency added, such as an expiry date. |
The Where column reads like "Engine 51 (Compartment 3)" when an item is carried on a unit. You can also see a unit's items from the unit itself, under Units.