IntelliScreen
IntelliScreen turns a TV into a live board: the active incident, who is responding, unit status, the crew on duty, weather, a clock, or anything else you arrange. You design screens, then assign them to displays. Saves go live on the TVs within seconds.
Where: ConnectIntelliScreen
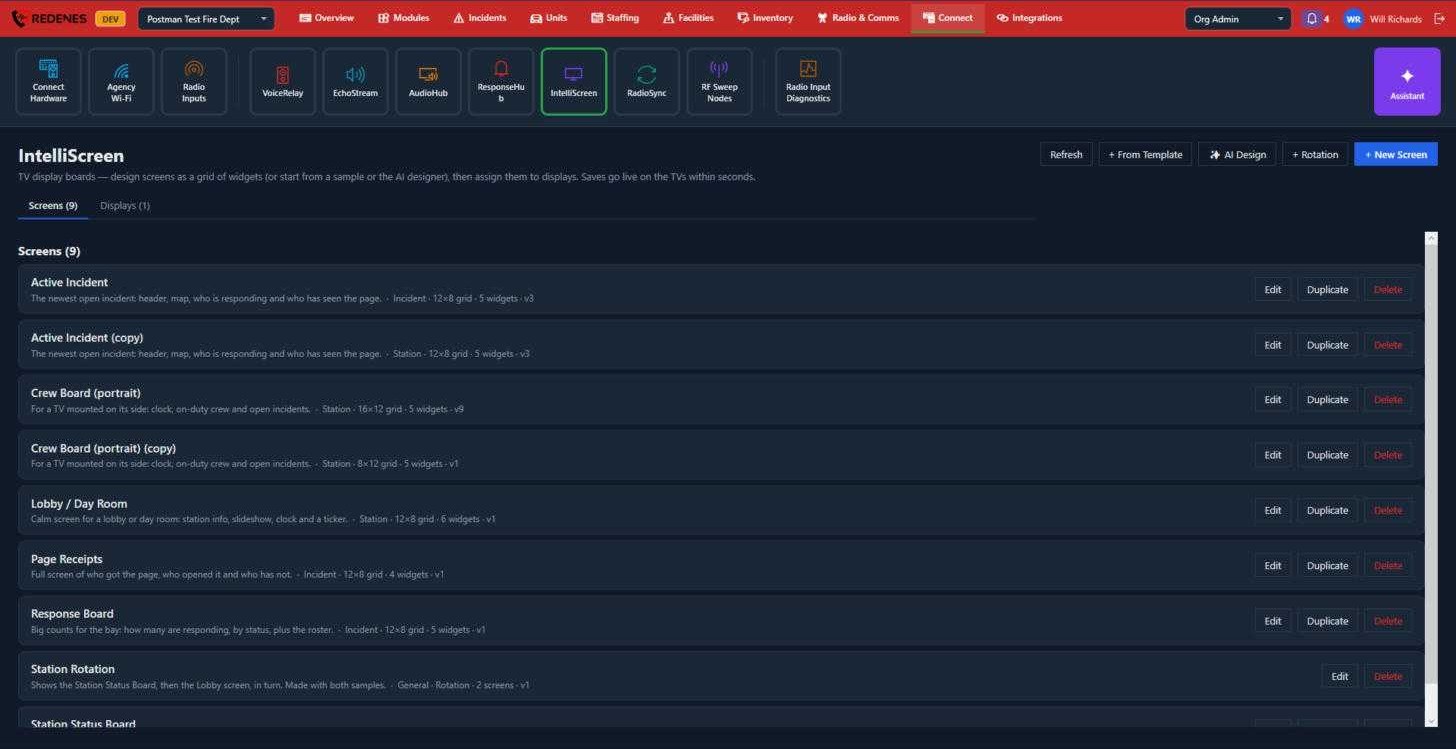 1234
Screens and displays 1
- Screens are the layouts.
- Displays are the physical TVs, each driven by an IntelliScreen unit. Open a display to choose which screen it shows, on each of its two monitor ports.
Make a screen 2
| Button | What it does |
|---|---|
| + New Screen | Starts an empty grid. Drag widgets onto it and size them. |
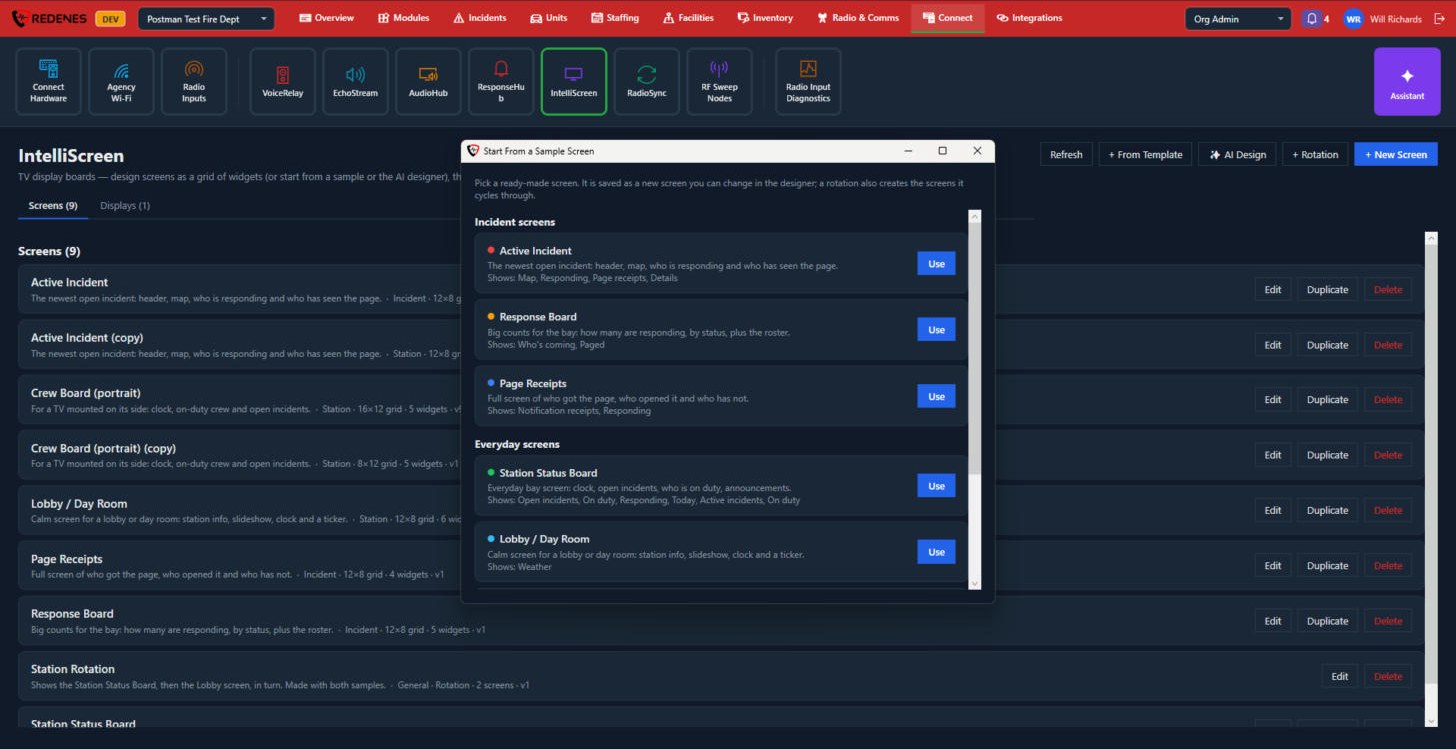
| + From Template | Starts from a ready-made sample such as Active Incident, Crew Board or Lobby. |
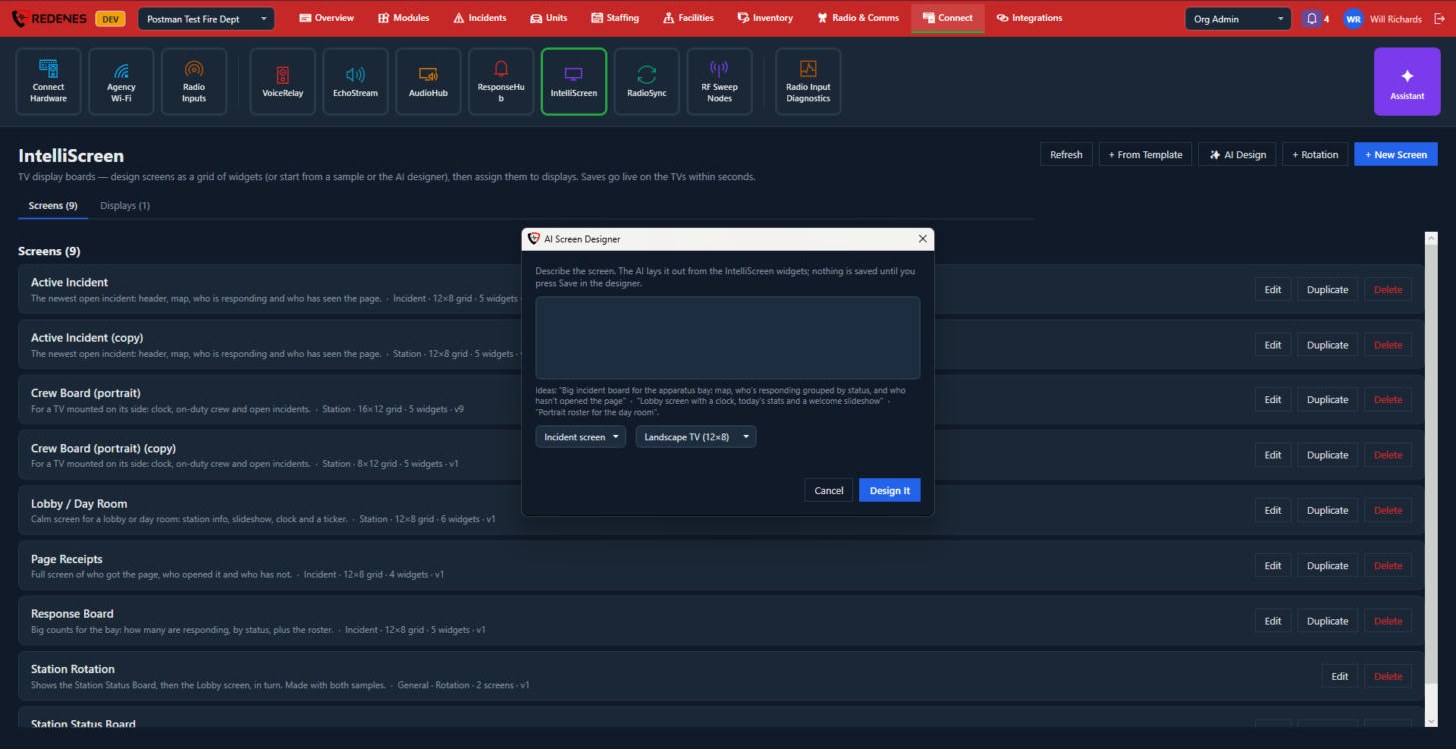
| AI Design | Describe the board you want in words and get a first layout to adjust. |
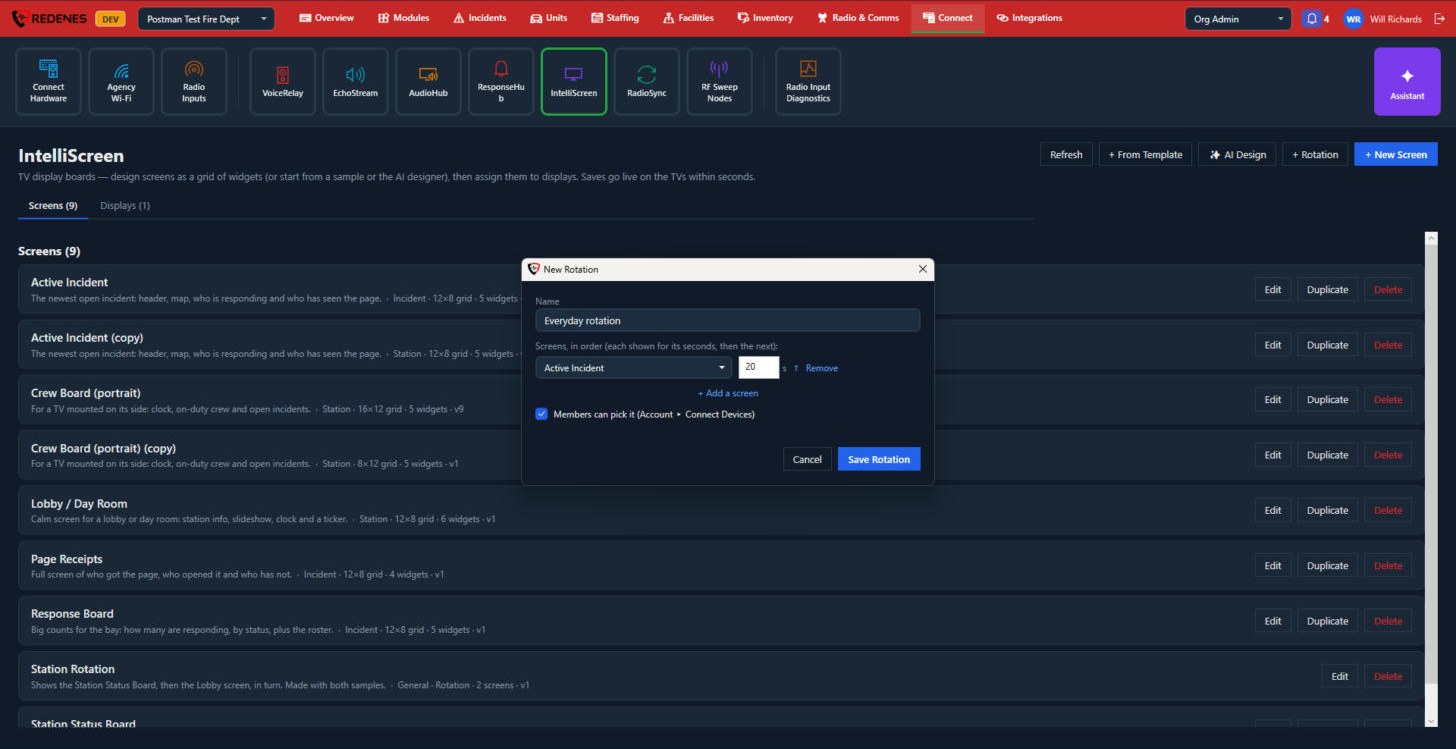
| + Rotation | Makes a screen that shows several other screens in turn. |
Each screen in the list shows its kind, grid size and number of widgets. Edit, Duplicate or Delete it 3. A Rotation 4 lists the screens it cycles through.
 123
Incident screens 1 are for a call in progress and Everyday screens 2 are for the rest of the time. Use 3 makes a screen from that sample.
 123
Describe the board in the box 1, pick its kind and size 2 and click Design It 3.
 12345
- Name 1.
- Each row 2 is a screen, how many seconds it stays up, and Remove.
- + Add a screen 3.
- Members can pick it 4 lets members choose this rotation for a display from the apps.
- Save Rotation 5.
Edit a screen
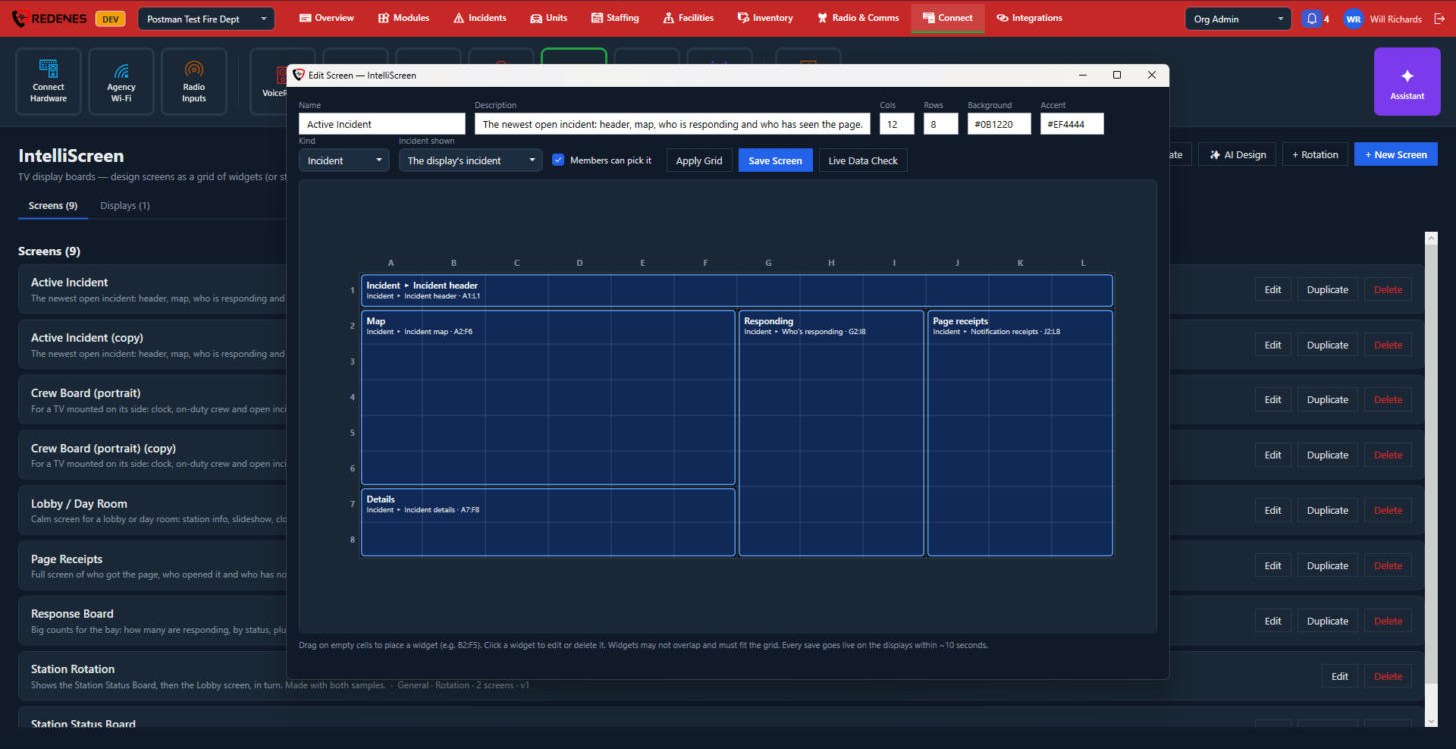 12345
- Name and Description 1.
- Cols, Rows, Background and Accent 2: the size of the grid and the colours.
- Kind, Incident shown and Members can pick it 3.
- Apply Grid, Save Screen and Live Data Check 4. Live Data Check fills the widgets with real data so you can see how the screen will look.
- The grid 5: click an empty cell to add a widget, or click a widget to change it.
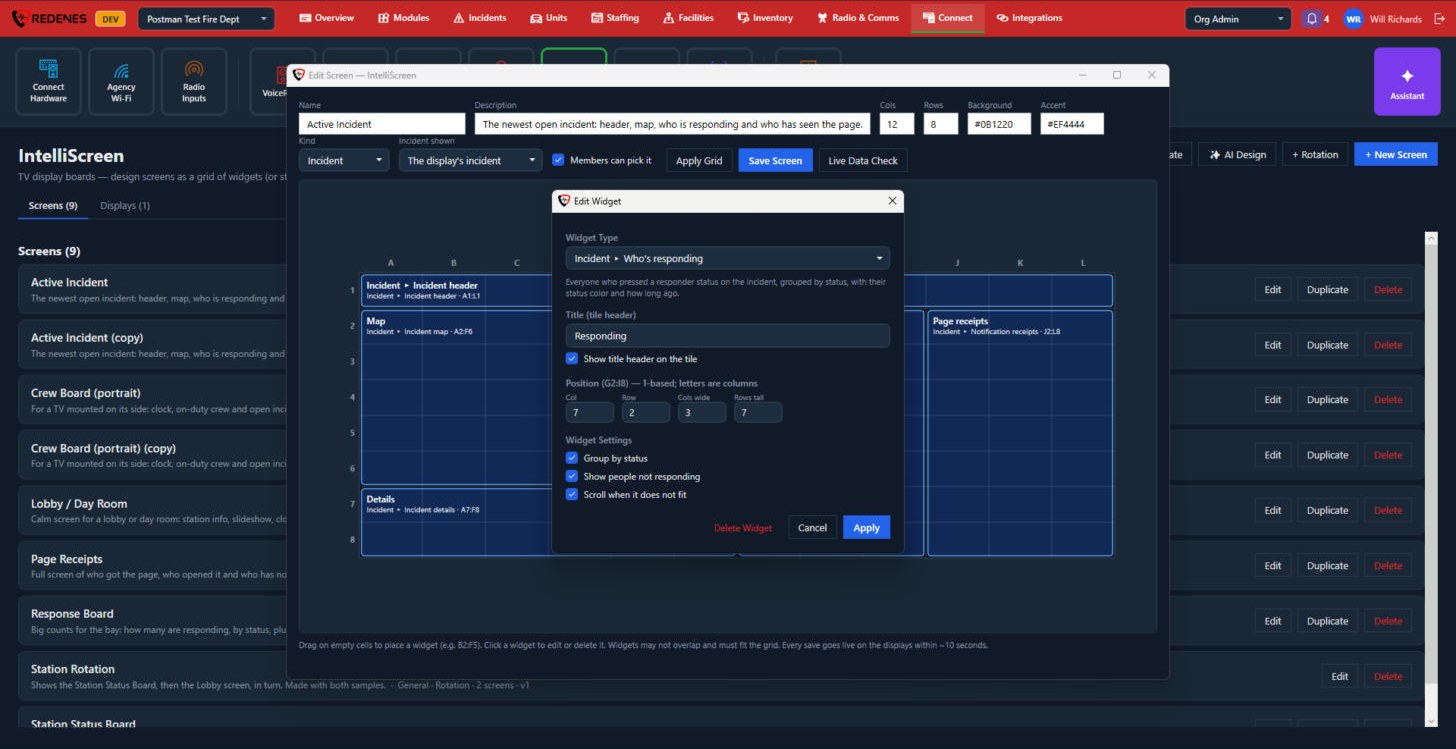 12345
- Widget Type 1: what the widget shows.
- Title 2.
- Position 3: the column and row it starts at, and how many it covers.
- Widget Settings 4: the options for that type of widget.
- Delete Widget, Cancel and Apply 5.
The Displays tab
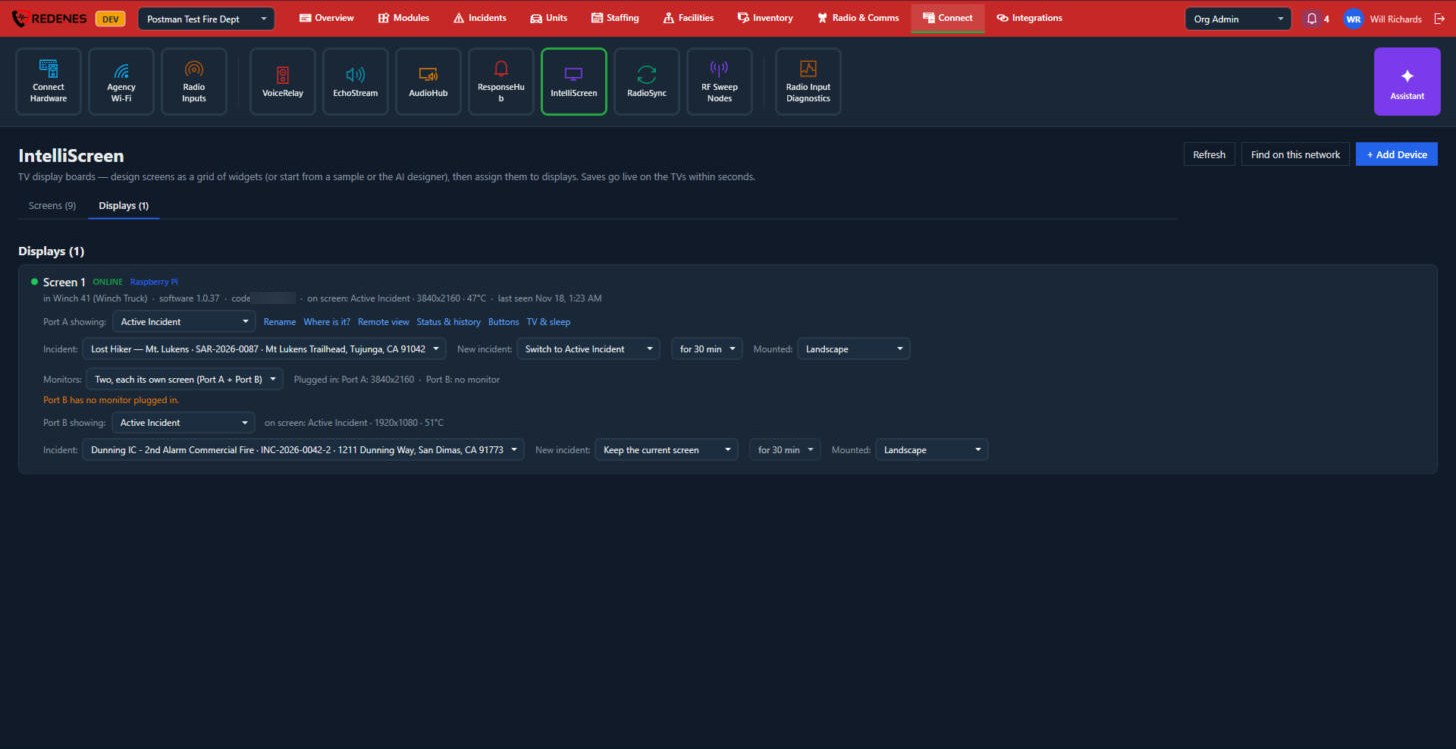 1234567
- The status line 1: online or offline, where it is, its software and what is on screen.
- Port A showing 2: the screen on the first monitor. The change goes to the TV as soon as you pick.
- The links 3: Rename, Where is it? (makes the TV show its name), Remote view (a picture of what the TV shows now), Status & history, Buttons and TV & sleep.
- Incident 4: which incident the screen shows, what happens when a new incident starts, and where the display is mounted.
- Monitors 5: one monitor, two with their own screens, or two showing the same.
- Port B 6: the same choices for the second monitor.
- Refresh, Find on this network and + Add Device 7.
Status & history shows the same sections as a device's page under Connect Hardware.
Buttons
A Stream Deck plugged into the IntelliScreen unit gives the crew 15 buttons at the TV.
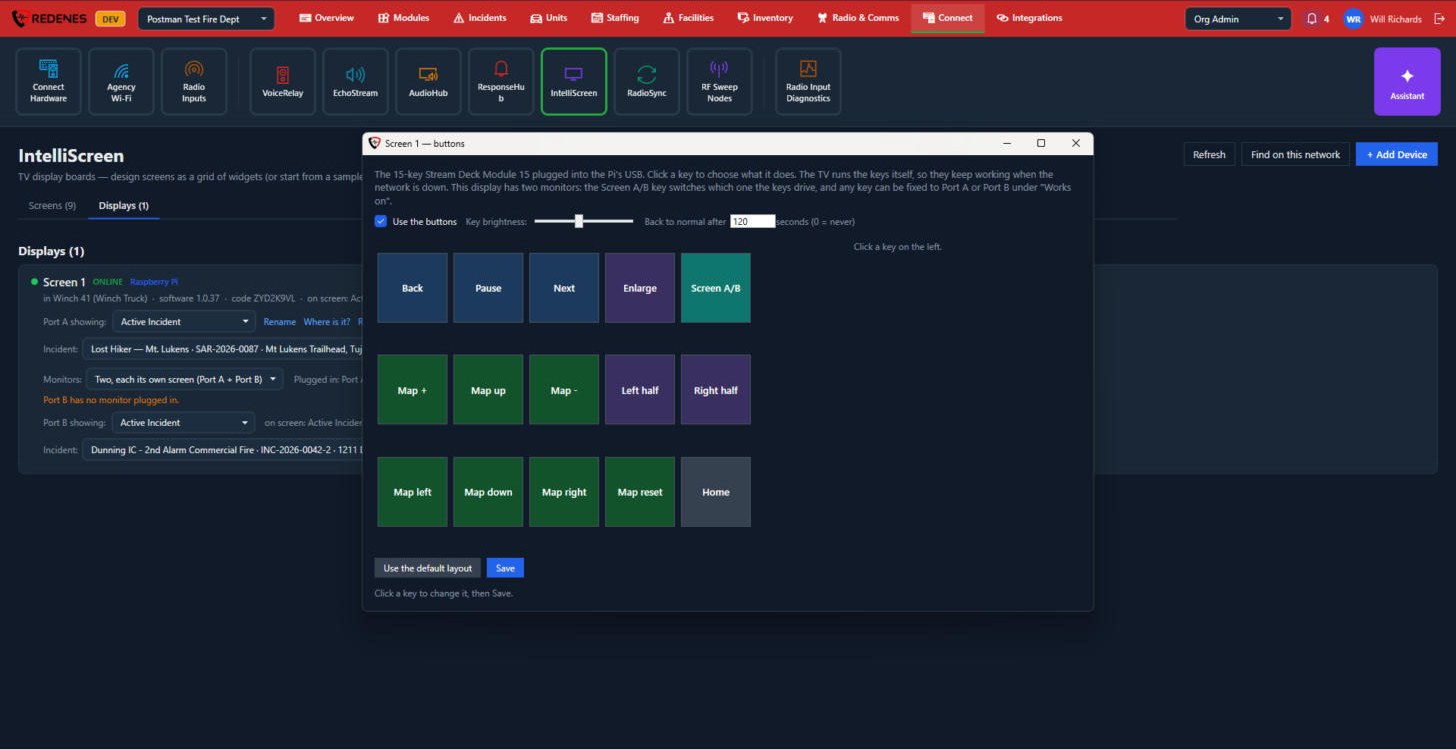 1234
- Use the buttons, Key brightness and Back to normal after 1.
- The keys 2: click one to choose what it does.
- Use the default layout and Save 3.
- The right side 4 shows the settings of the key you clicked.
TV & sleep
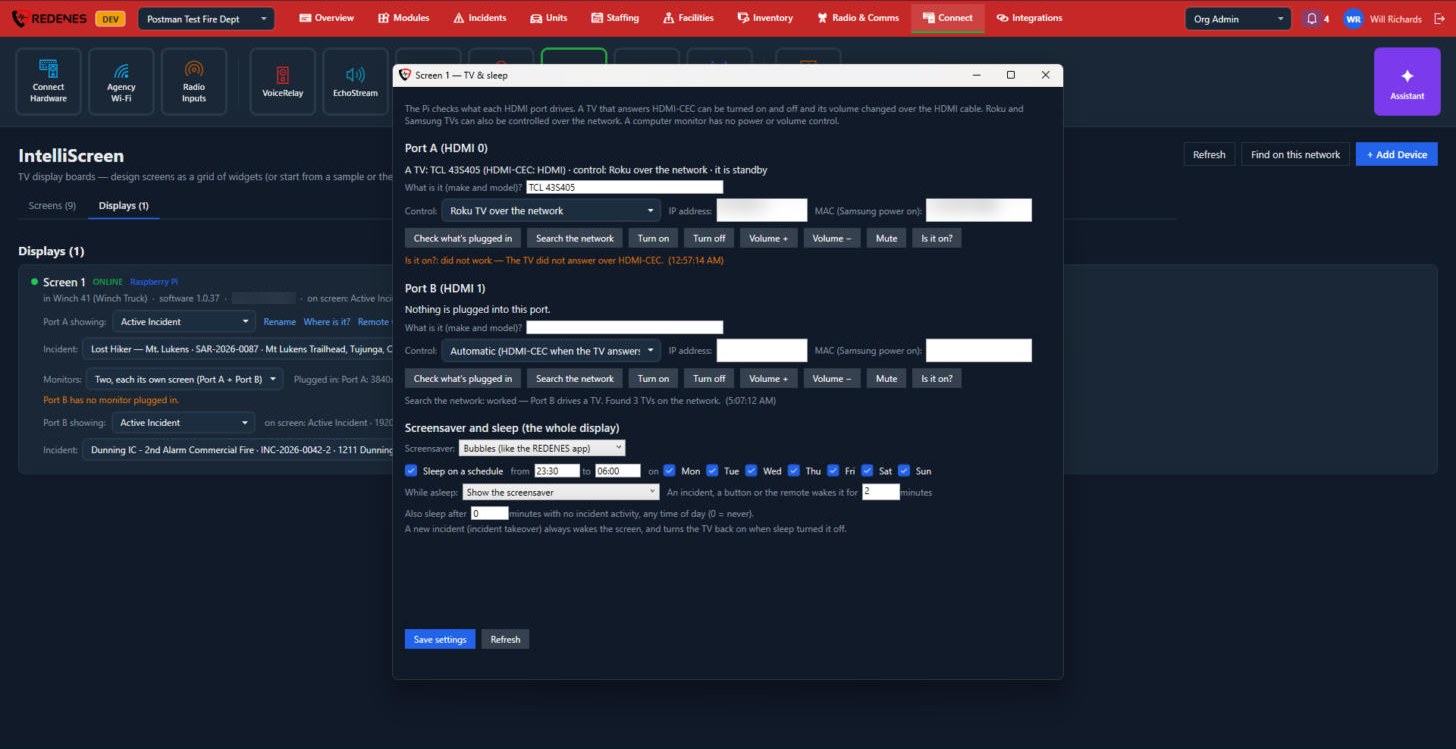 1234
- Port A 1: what is plugged in, how it is controlled, and buttons to check it, turn it on or off and change its volume. A TV can be controlled over the HDMI cable, and Roku and Samsung TVs over the network. A computer monitor has no power or volume control.
- Port B 2: the same for the second port.
- Screensaver and sleep 3: the screensaver, a sleep schedule by time and weekday, what the screen does while asleep, and sleep after so many minutes with no incident activity. A new incident always wakes the screen.
- Save settings 4.
Tips
- Use an Incident screen for boards that should take over when a call comes in, and a Station screen for the everyday view.
- For a TV mounted on its side, start from the portrait template.
- Duplicate a screen before a big change. You can go back to the copy if you do not like the result.
Add a display
A new IntelliScreen unit is added under Connect Hardware. When it first starts, the TV shows a setup code. Enter it there, then come back to the Displays tab to give the display a name and a screen.
From a display's page you can also see what the TV is showing right now, turn the TV on or off, and change its volume, where the TV supports it.