Membership
Membership is how people get into your agency: invites you send, requests people send you, and the defaults a new member starts with.
Where: OverviewMembership
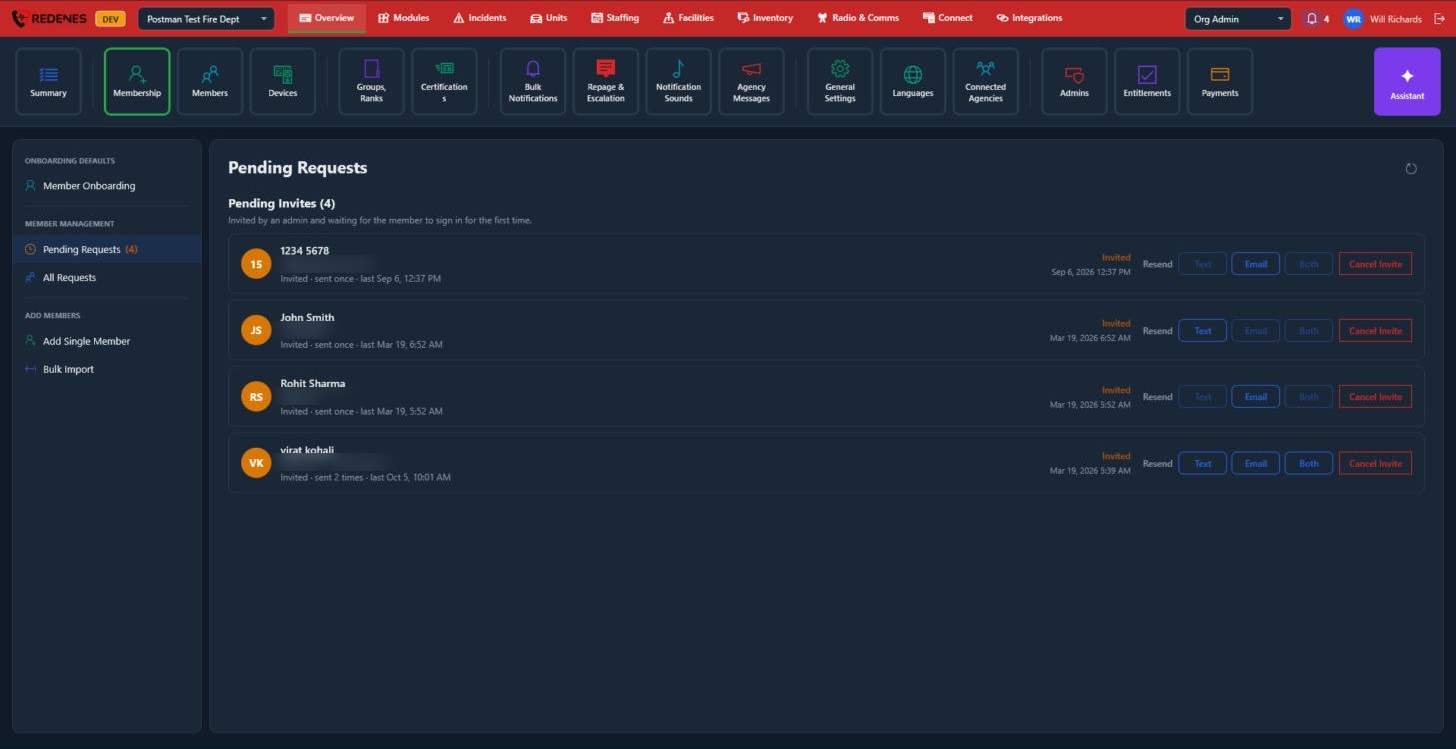 123
The menu on the left 1
| Item | What it does |
|---|---|
| Member Onboarding | The defaults a new member gets when they join, so they start with the right groups and settings. |
| Pending Requests | Invites still waiting, and people who asked to join and need your answer. The number shows how many are waiting. |
| All Requests | The full history, including approved, declined and cancelled ones. |
| Add Single Member | Invite one person by name with their mobile number or email. |
| Bulk Import | Add many people at once from an Excel file. |
Follow up on an invite 3
- Resend by Text, Email or Both. A button is greyed out when you have no number or address for that person.
- Cancel Invite withdraws it. The link they received stops working.
Requests to join
People who typed your org code in the app appear in Pending Requests with Approve and Decline. Approving makes them a member right away with the onboarding defaults.
Member Onboarding
The defaults that are filled in for you whenever you add a member or approve a request. Set them once so new people start in the right place.
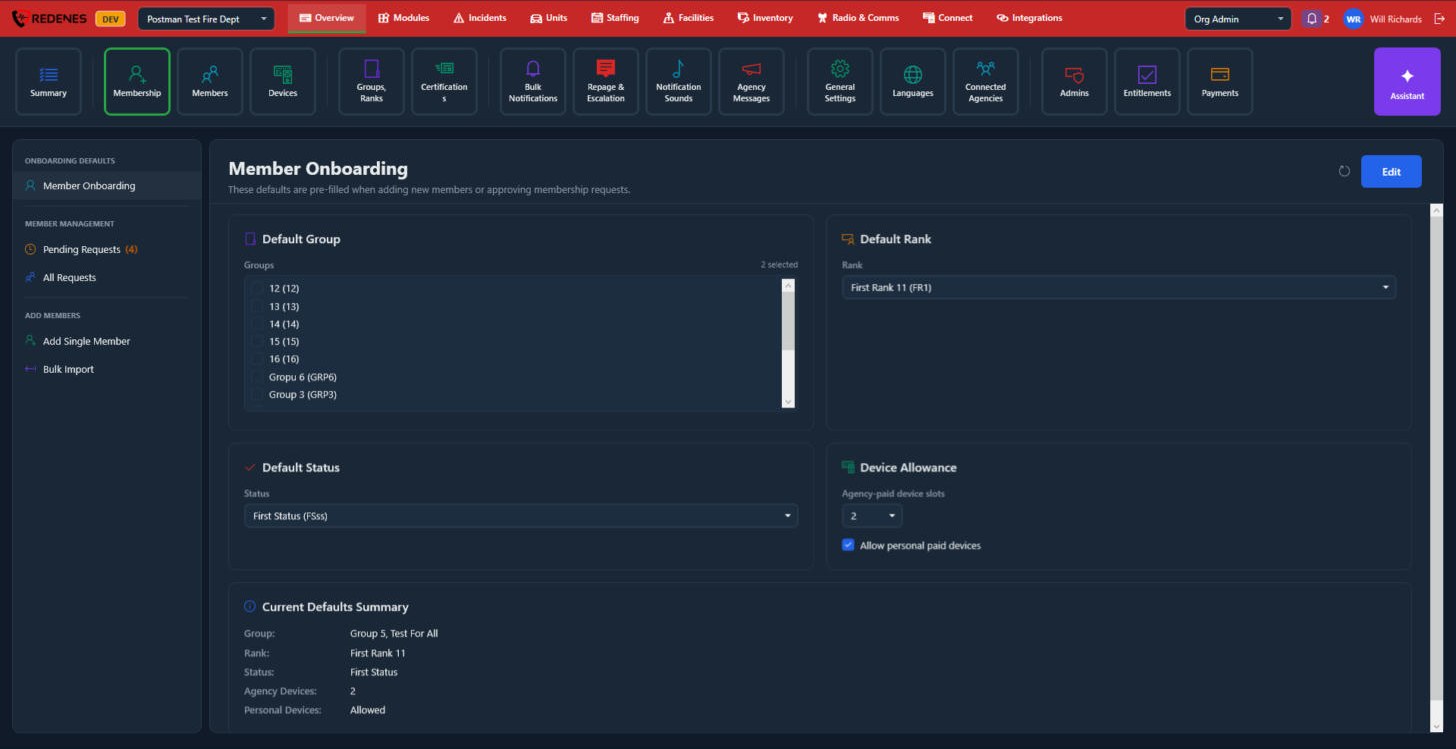 123456
- Click Edit 1.
- Default Group 2: tick the groups every new member should be in. The count at the top right of the box shows how many are ticked.
- Default Rank 3 and Default Status 4: what a new member starts as.
- Device Allowance 5: how many device licenses the agency pays for each new member, and whether they may add personal devices they pay for themselves.
- Save. Current Defaults Summary 6 repeats what is in force now.
These are only starting values. You can change any of them for one person when you add them, or later with Assign on their page under Members.
All Requests
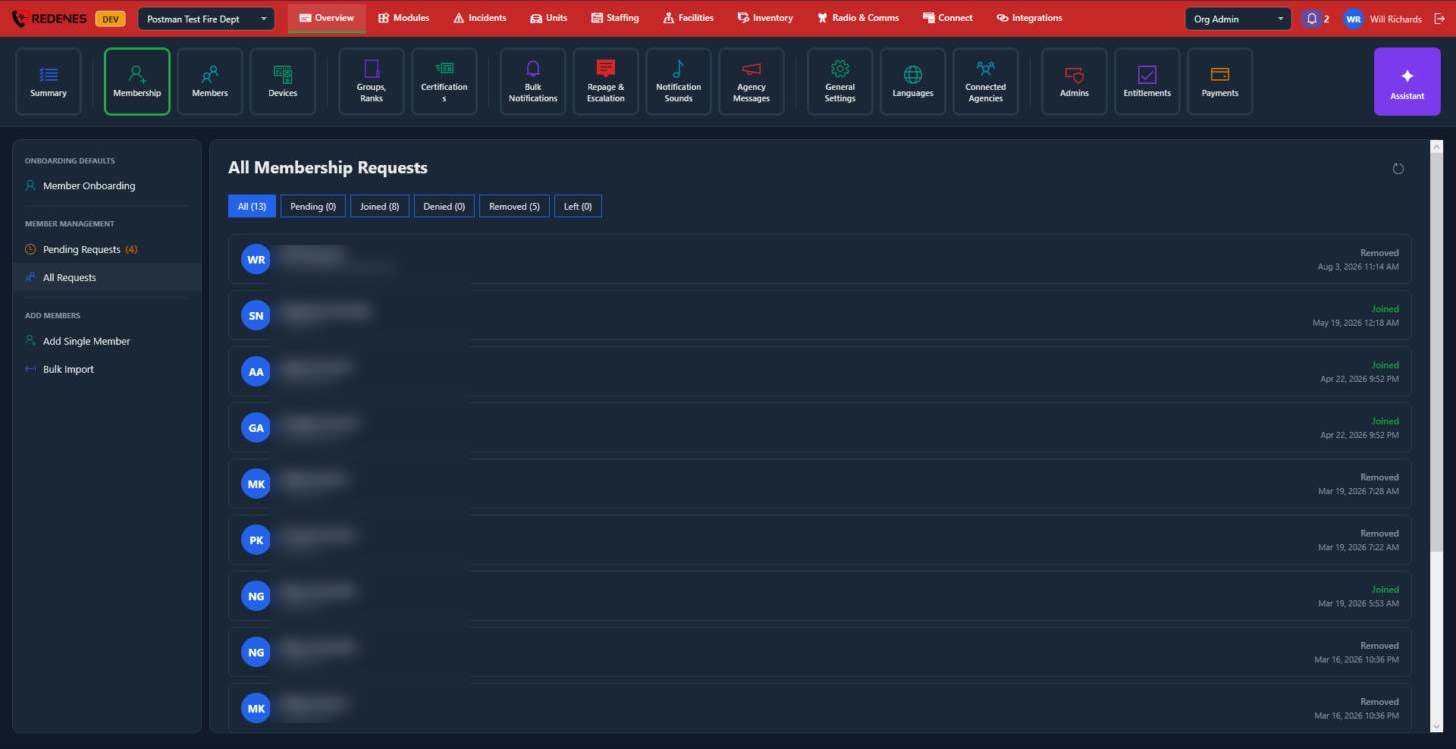 12
The full history of invites and requests. The buttons 1 filter the list: All, Pending, Joined, Denied, Removed (taken out by an admin) and Left (the person left on their own). The number in each button is how many there are. The outcome and its date are on the right of each row 2.
Add Single Member
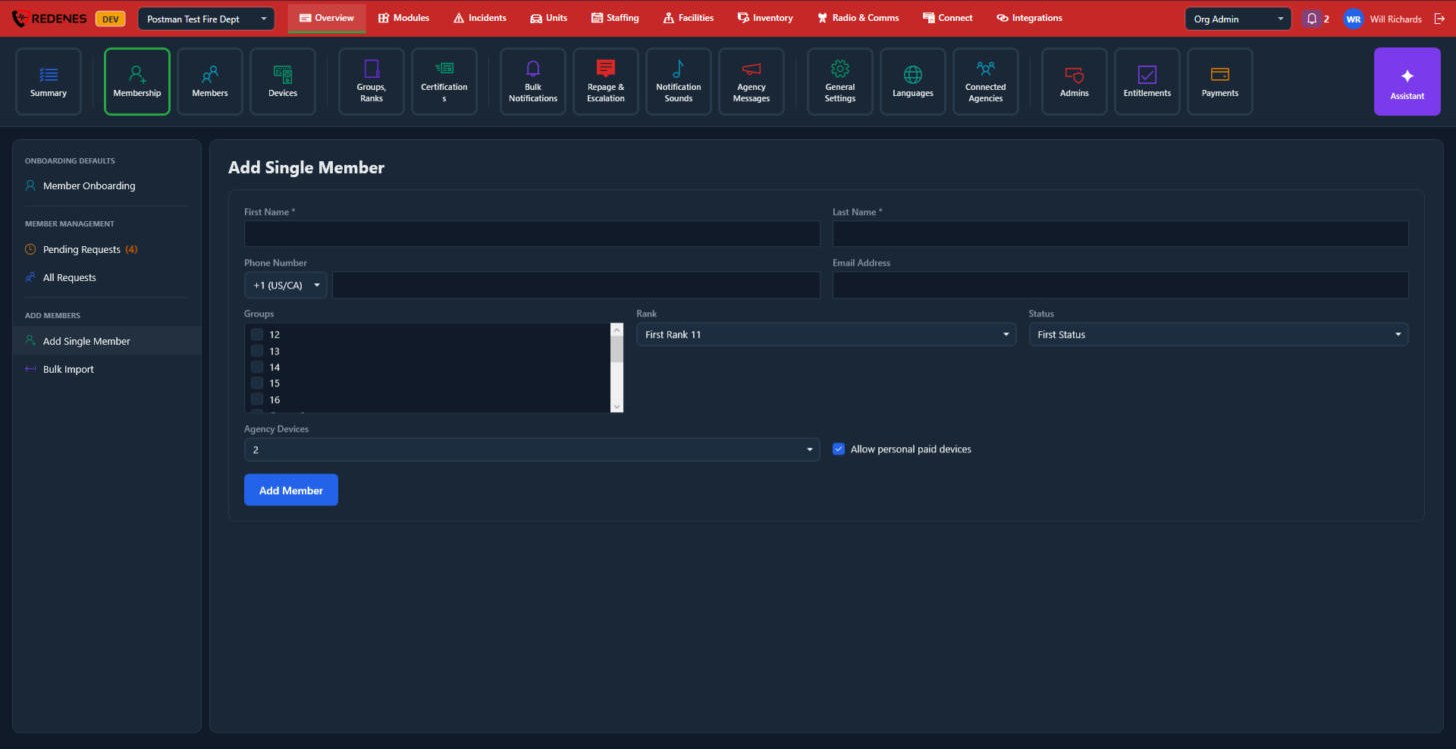 12345
- Type the First Name and Last Name 1. Both are required.
- Give a Phone Number, an Email Address, or both 2. Pick the country code in front of the number. The invite goes to whatever you fill in.
- Groups, Rank and Status 3 start on your onboarding defaults. Change them for this person if needed.
- Agency Devices and Allow personal paid devices 4 also start on the defaults.
- Click Add Member 5. The person gets a text or email with a link to install the app and sign in, and shows under Pending Requests until they do.
Bulk Import
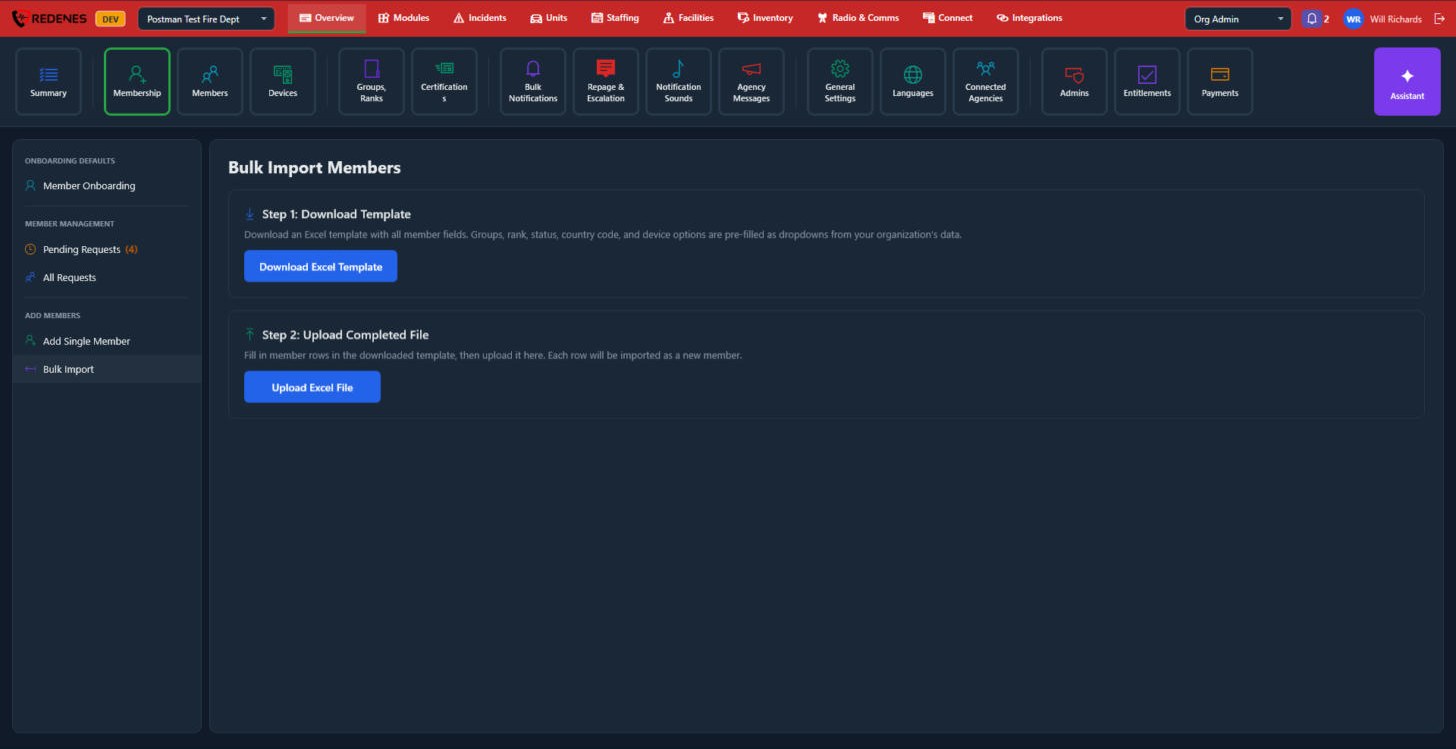 12
- Click Download Excel Template 1. The file has a column for every member field. Groups, rank, status, country code and device options are already dropdowns filled from your agency, so the values always match.
- Fill in one row per person and save the file.
- Click Upload Excel File 2 and choose it. Each row becomes a new member.