Members
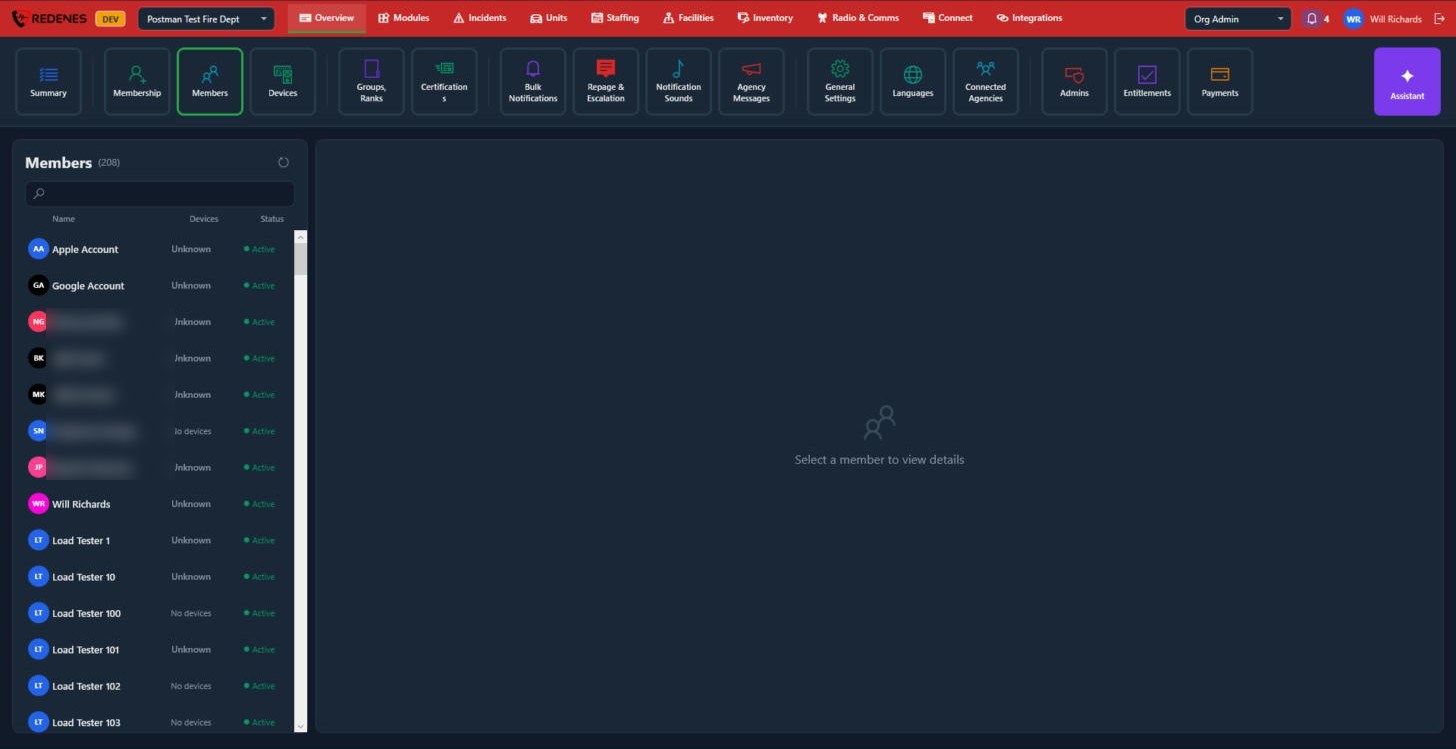
Members lists everyone in the agency. Click a person to open their page, where you can see and change everything about their membership.
Where: OverviewMembers
 12
The list
- Search 1 by any part of a name.
- Devices and Status 2 show at a glance whether the person has a device signed in and whether their membership is active.
- The round arrow at the top of the list reloads it.
A member's page
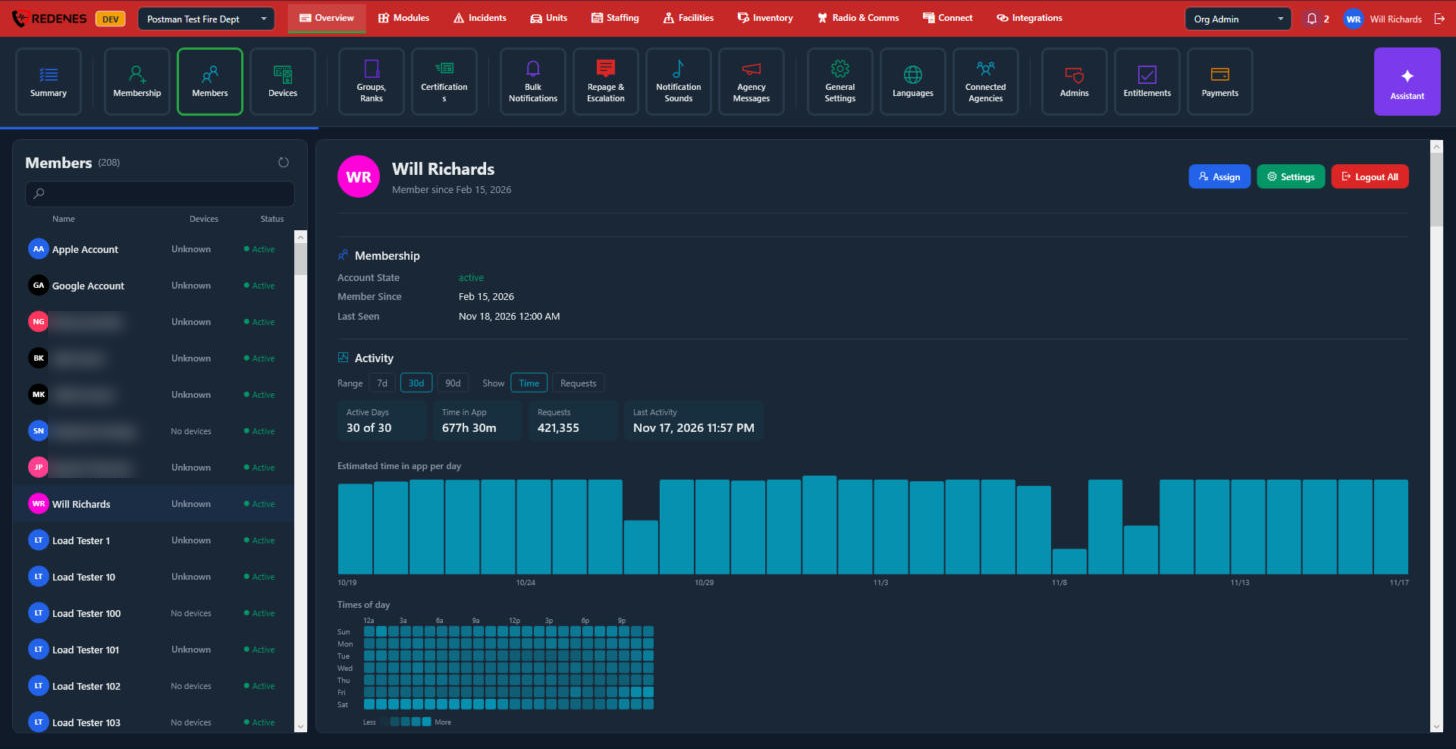
Click a member and their page opens on the right. It is one long page, so scroll down to see all of it. From top to bottom it has: the three buttons, Membership, Activity, Groups Rank & Status, Certifications, Devices, Module Permissions and Remove from agency.
 12345
The three buttons 1
| Button | What it opens |
|---|---|
| Assign | The member's groups, rank, status and device licenses. See Assign. |
| Settings | The member's own app settings and notification levels, which you can change for them. See Settings. |
| Logout All | Signs the member out of every device at once. They can sign in again. |
Membership 2
Whether the account is active, the date they joined and when they were last seen.
Activity
How much the member uses REDENES.
- Range and Show 3: look at the last 7, 30 or 90 days, and switch the chart between time in the app and number of requests.
- The four boxes 4: days they were active, total time in the app, number of requests and their last activity.
- Estimated time in app per day 5: one bar per day. Hold the mouse over a bar to see that day's numbers.
 1234
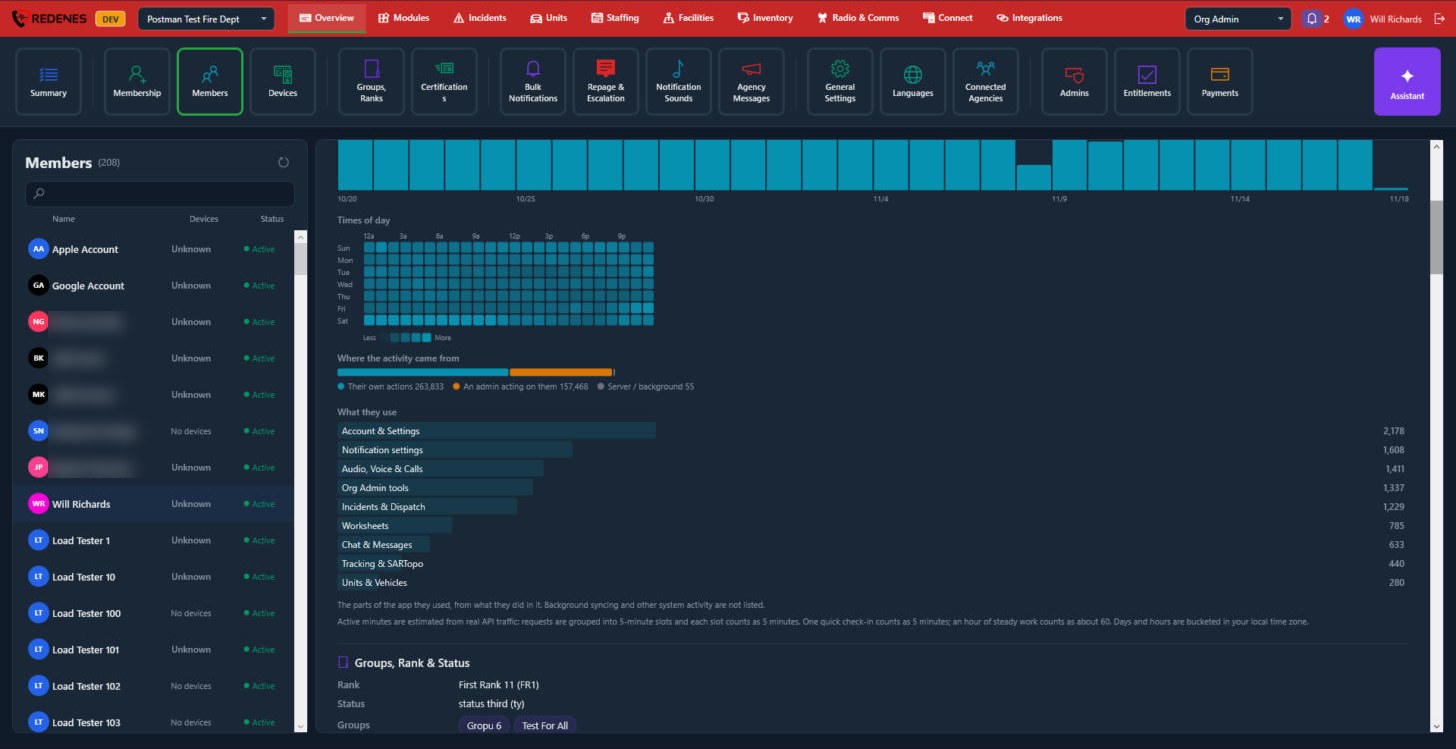
- Times of day 1: a grid of weekdays against hours. Darker squares are the hours they use the app most.
- Where the activity came from 2: their own actions, an admin acting on them, or the server working in the background.
- What they use 3: the parts of the app they open most, largest first.
Active minutes are an estimate made from real traffic, in 5-minute steps, in your local time zone.
Groups, Rank & Status 4
The member's rank, status and groups. To change them, use Assign at the top of the page.
Certifications
 1234
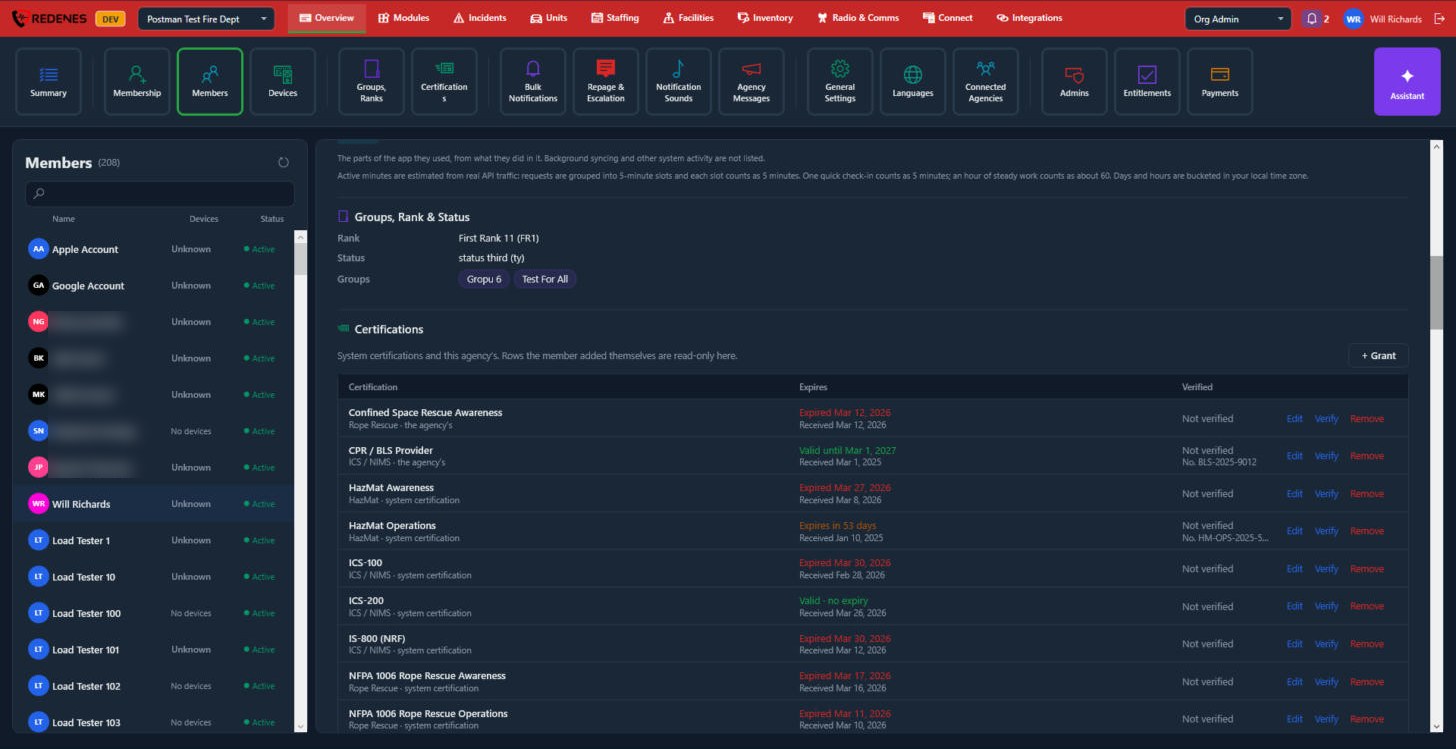
Every certification the member holds, from the system list and from your agency's own list. Rows the member added themselves are read-only here.
- + Grant 1 gives the member a certification. See below.
- Expires 2 is green while valid, orange when it runs out soon and red once it has expired.
- Verified 3 shows whether an admin has seen the certificate, and the certificate number if there is one.
- Edit, Verify and Remove 4 change the dates or number, mark it as verified, or take it off the member.
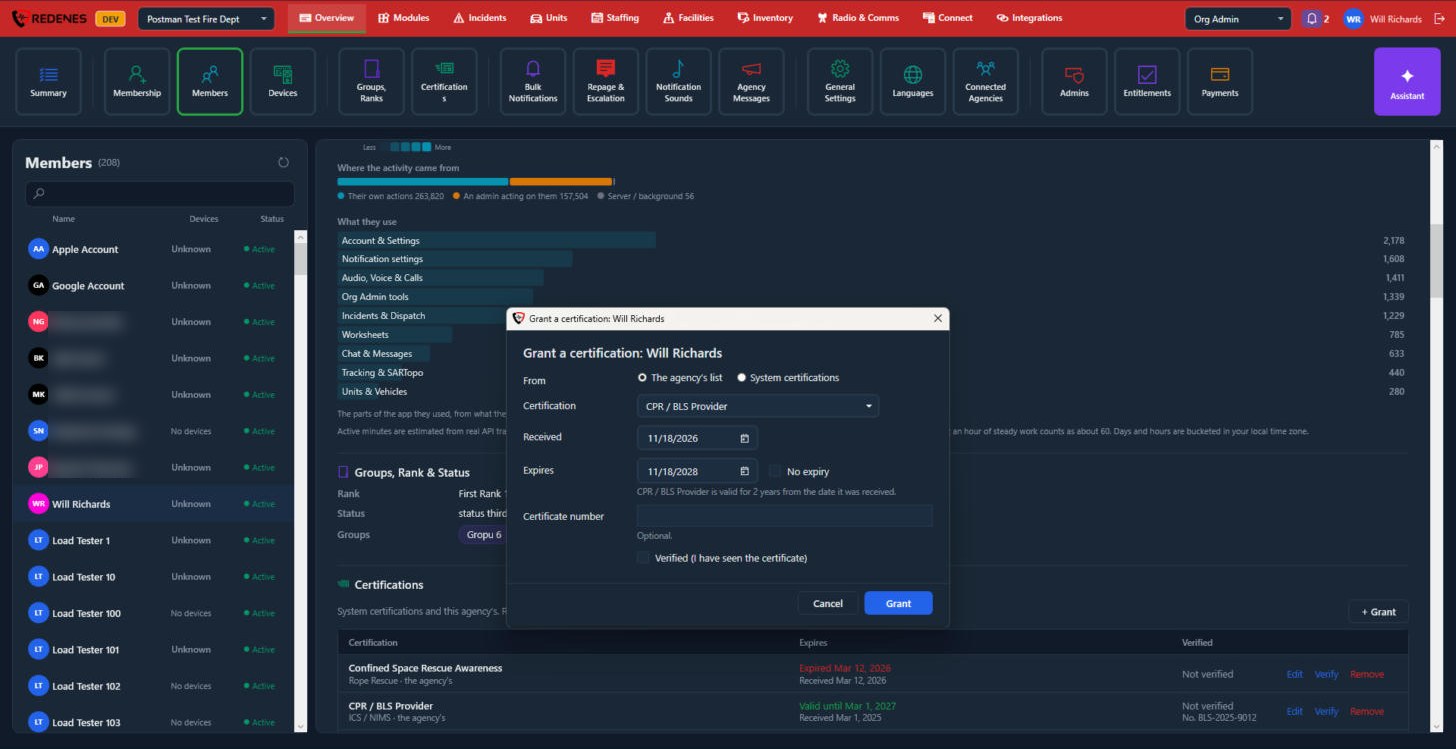 1234
To grant one:
- Choose The agency's list or System certifications 1, then pick the Certification 2.
- Set the Received date. Expires 3 fills in from how long that certification is valid, and you can change it or tick No expiry.
- Add the Certificate number if you have it, and tick Verified 4 if you have seen the certificate.
- Click Grant.
Your agency's own list is set up under Certifications.
Devices
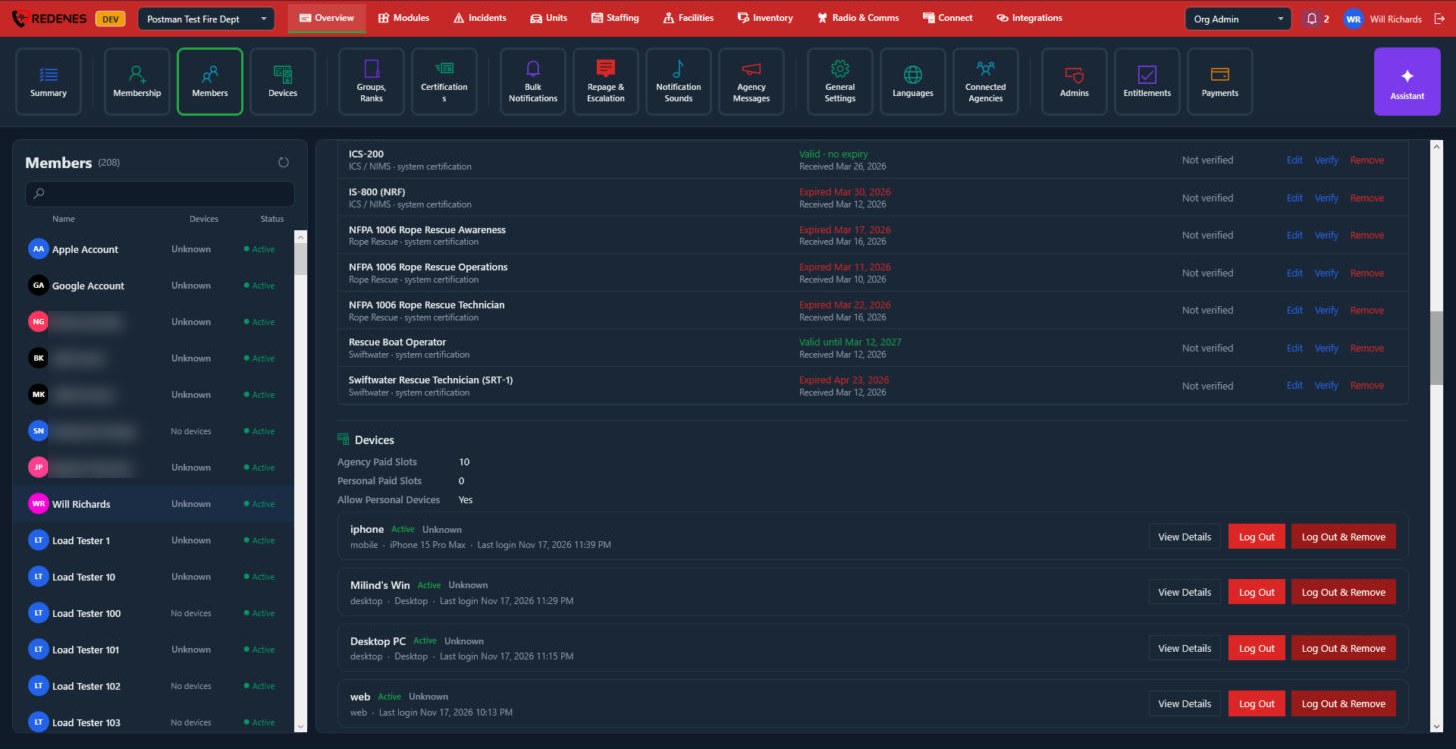 123
- The three lines at the top 1 show how many device licenses the agency pays for this member, how many they pay for themselves, and whether personal devices are allowed.
- Each device 2 shows its name, whether it is signed in, its type and model, and the last login. Devices that are signed out are at the bottom of the list.
- The buttons 3:
| Button | What it does |
|---|---|
| View Details | Opens the device's details. See below. |
| Log Out | Signs that one device out. The member can sign in on it again. |
| Log Out & Remove | Signs it out and takes it off the member's list. |
| Remove | Shown on a device that is already signed out. Takes it off the list. |
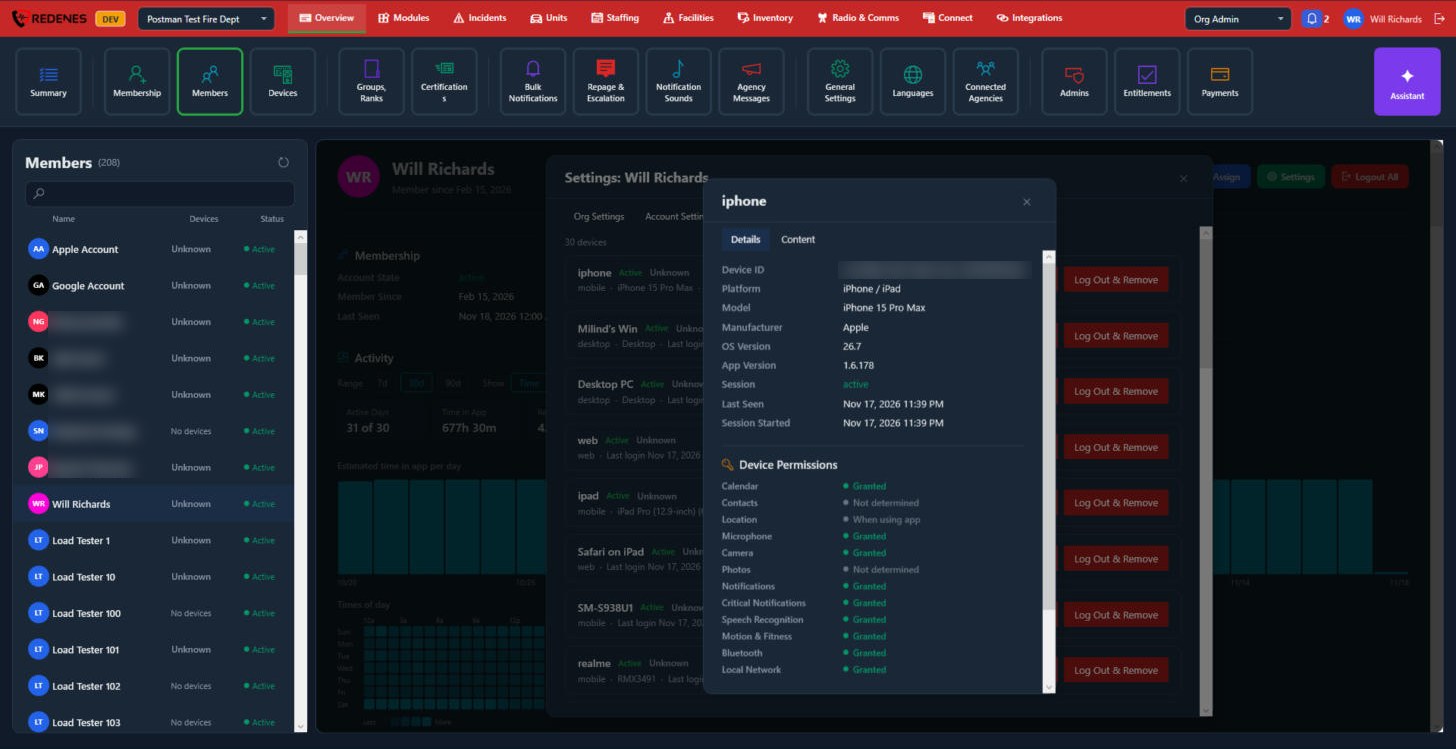 123
The device window has two tabs 1:
- Details shows the platform, model, operating system and app version, and the session 2. Device Permissions 3 lists what the member allowed on that phone: location, notifications, critical notifications, microphone, camera, Bluetooth and so on. This is the first place to look when someone says they get no alerts or their location does not show.
- Content shows whether the device has the newest agency data, and a history of when it fell behind and caught up. A device that has never reported shows Not reported yet.
Module Permissions and removing a member
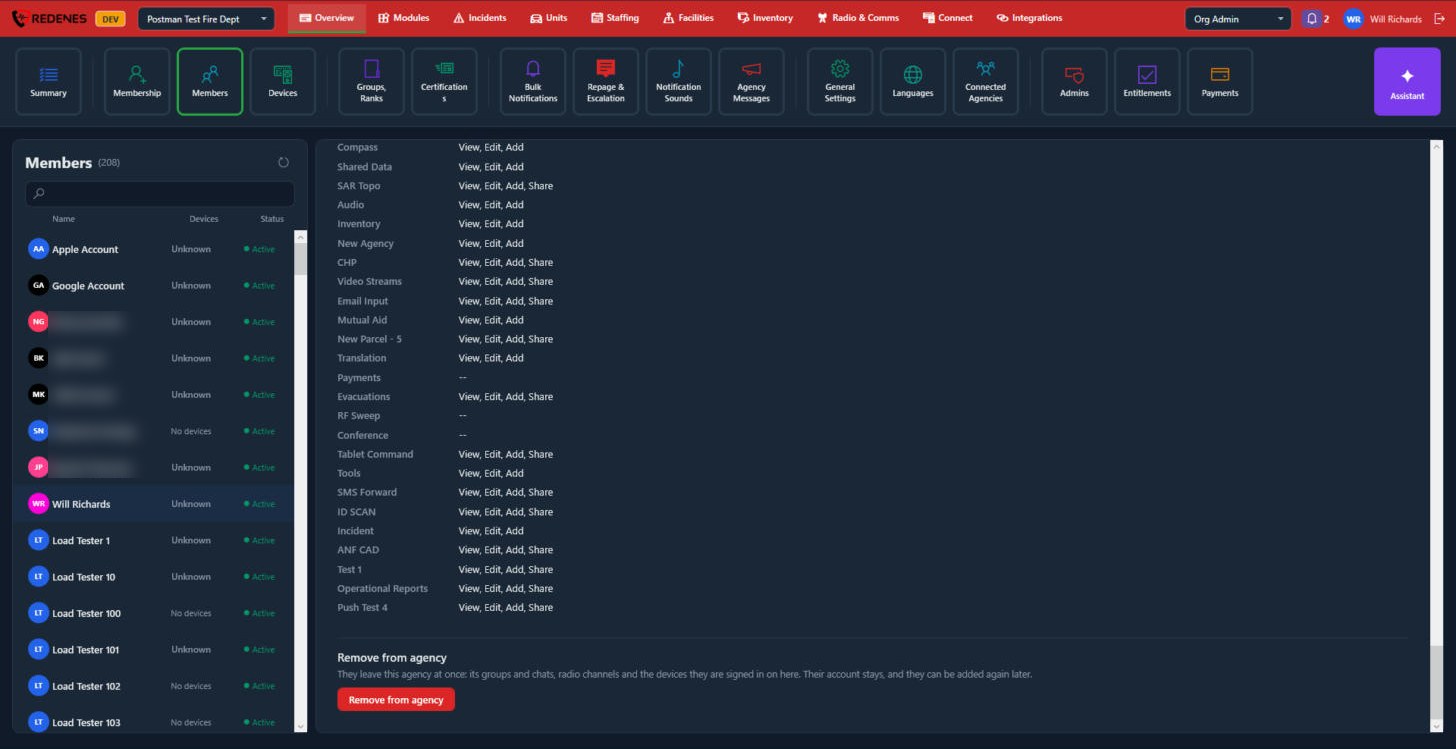 12
- Module Permissions 1 lists every module and what this member may do in it: View, Edit, Add or Share. Two dashes mean no access. The list is worked out from the member's groups. To change it, go to Module Permissions.
- Remove from agency 2 takes the person out of the agency at once: its groups and chats, its radio channels and the devices they are signed in on here. Their REDENES account stays, and they can be added again later.
Assign groups, rank, status and licenses
Click Assign at the top of a member's page.
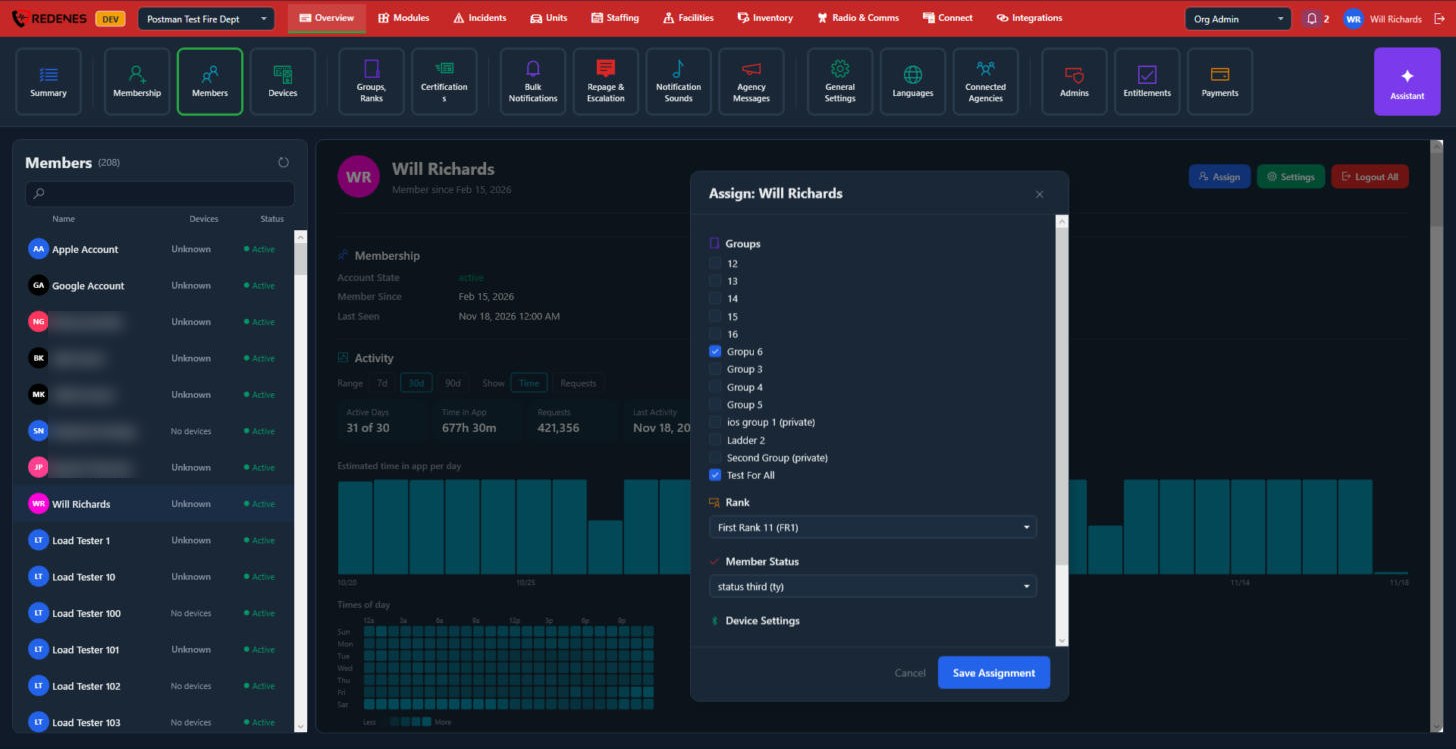 1234
- Groups 1: tick every group the member belongs to.
- Rank 2 and Member Status 3: pick one of each.
- Save Assignment 4 saves everything in the window. Cancel closes it without changes.
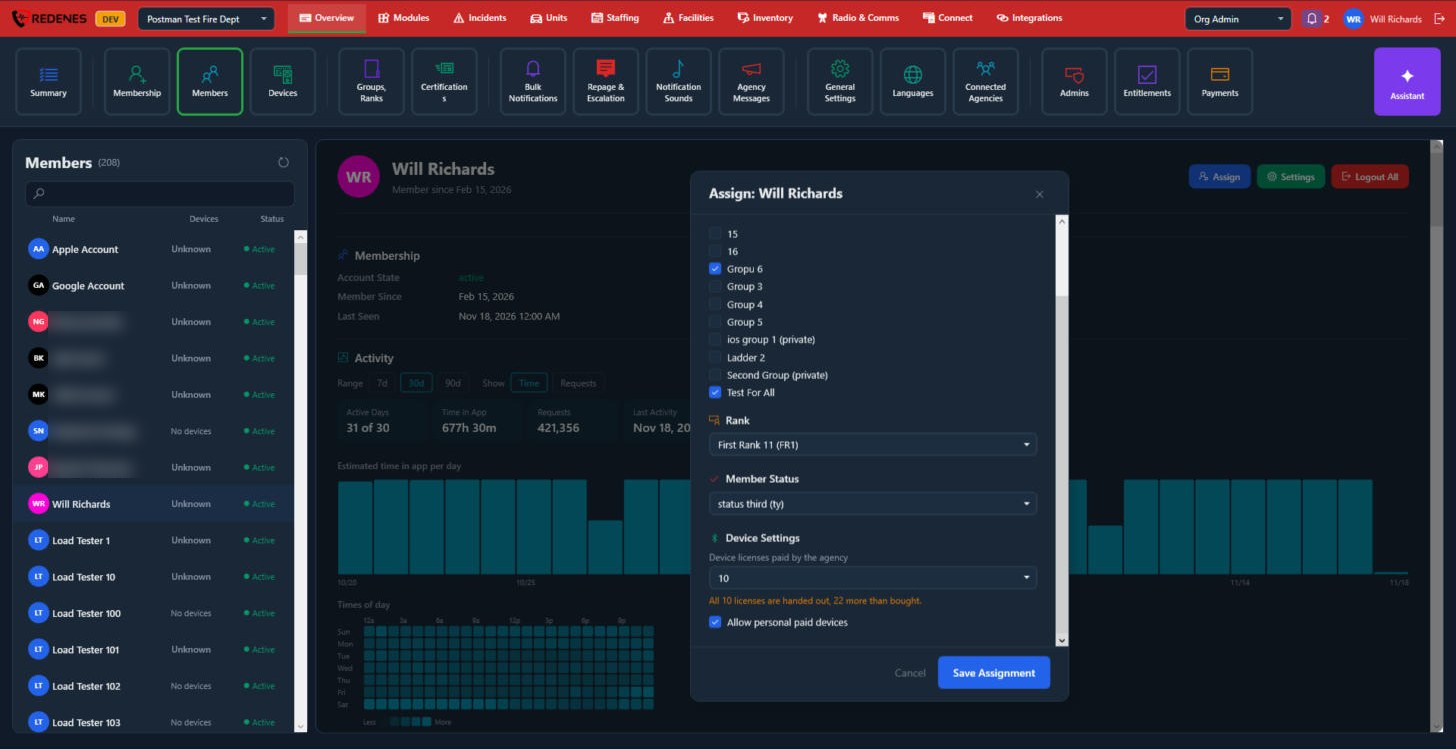 1
Device Settings 1:
- Device licenses paid by the agency is how many phones or tablets this member may use on the agency's licenses. An orange line warns you when more licenses are handed out than the agency has bought.
- Allow personal paid devices lets the member add devices they pay for themselves.
A member's settings
Click Settings at the top of a member's page. The window has five tabs. These are the same settings the member has in their own app, so use them to help someone who cannot find a setting or to fix a setting for them.
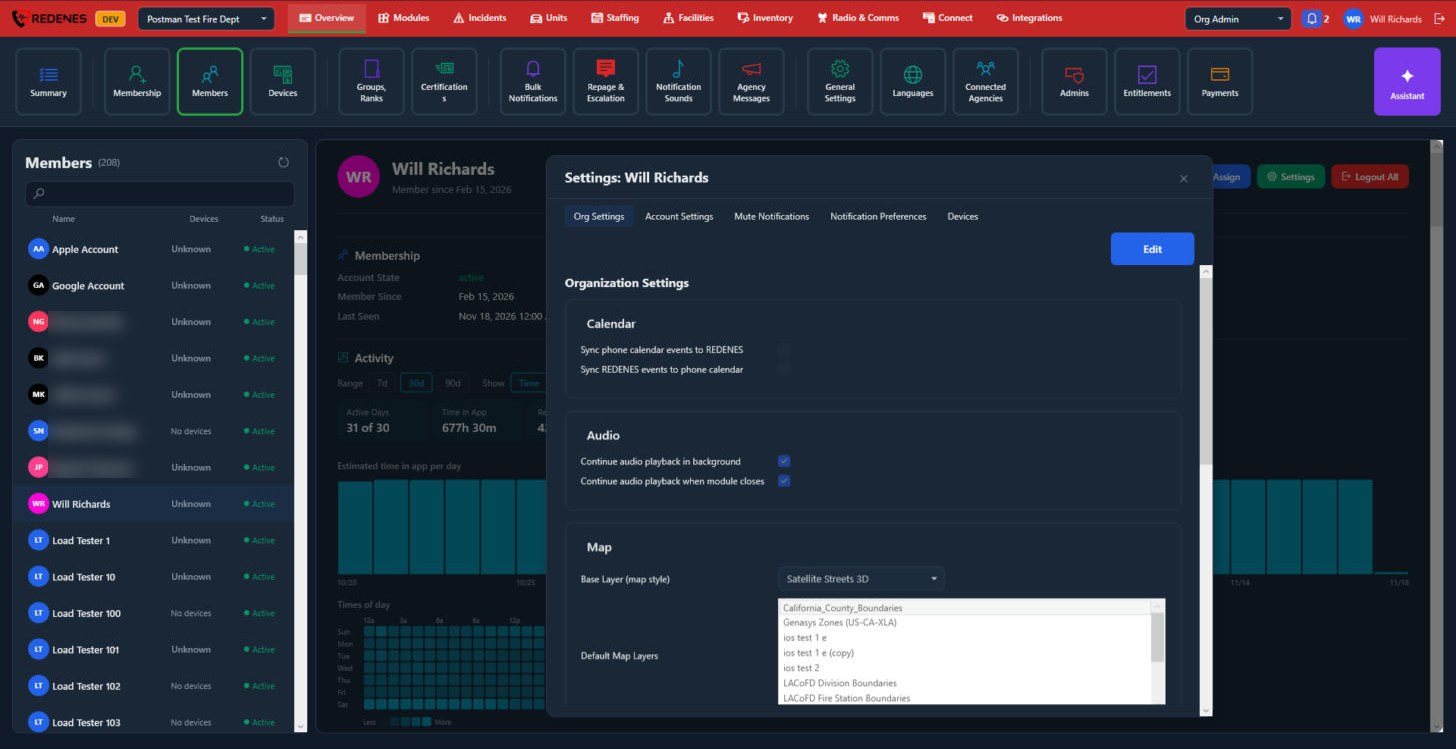 12
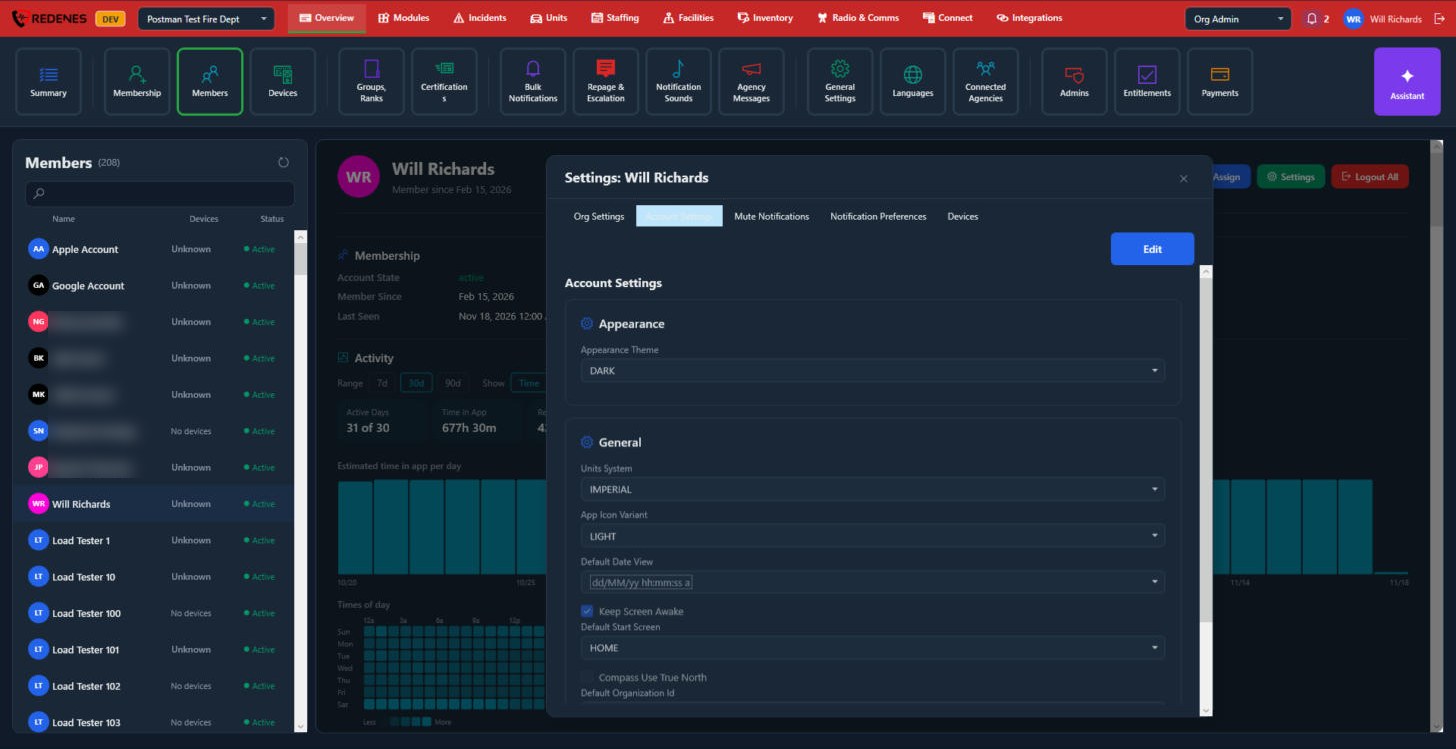
Pick a tab 1. On the first two tabs click Edit 2 to change anything, then save.
| Tab | What is on it |
|---|---|
| Org Settings | The member's settings for this agency: calendar syncing, audio playing in the background, map style and default map layers, and more below. |
| Account Settings | Settings that follow the person: appearance, units, date format, keep the screen awake, start screen. |
| Mute Notifications | Silence all of this member's notifications for a while. |
| Notification Preferences | The level of every notification, for each duty status. |
| Devices | The same device list as on the member's page. |
Mute Notifications
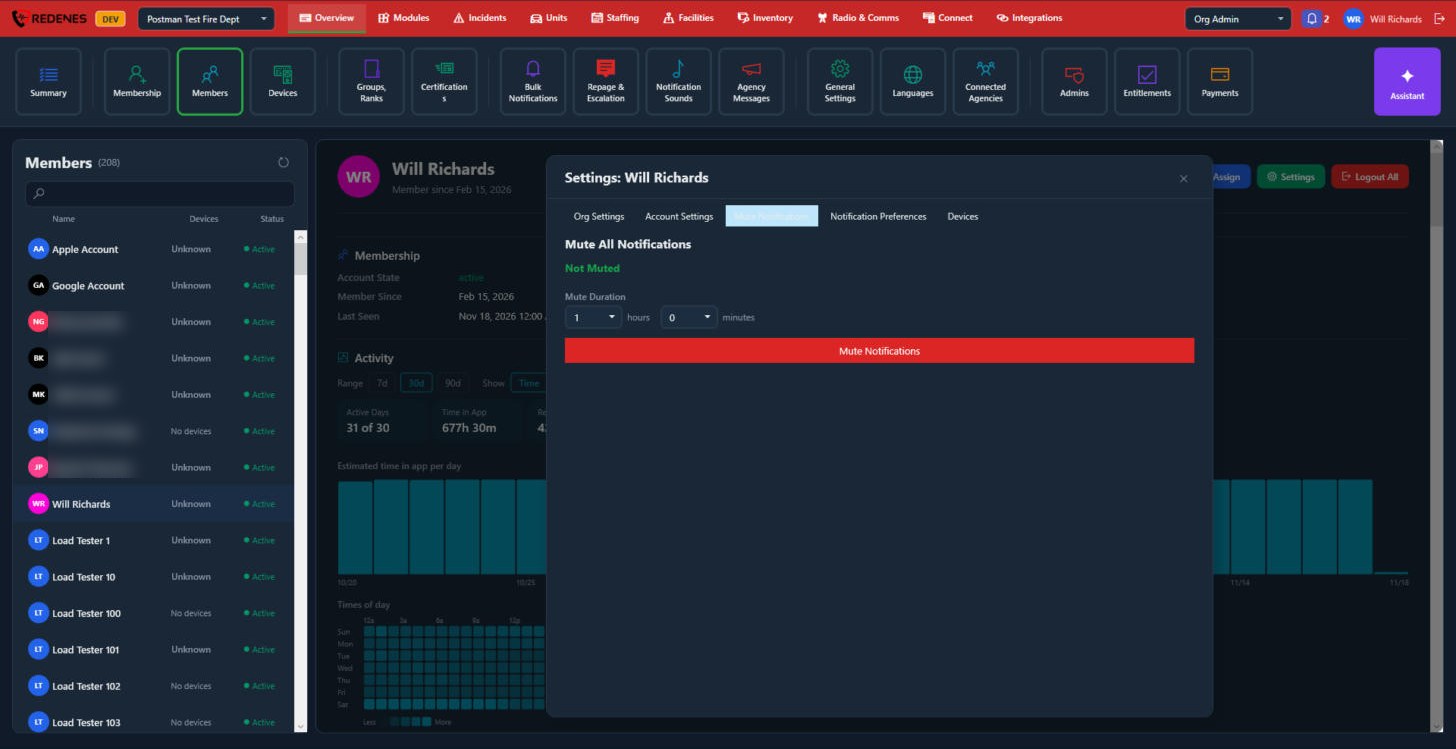 12
Choose the hours and minutes 1 and click Mute Notifications 2. The line above shows whether the member is muted now. While someone is muted, nothing is repaged, texted or called either.
Notification Preferences
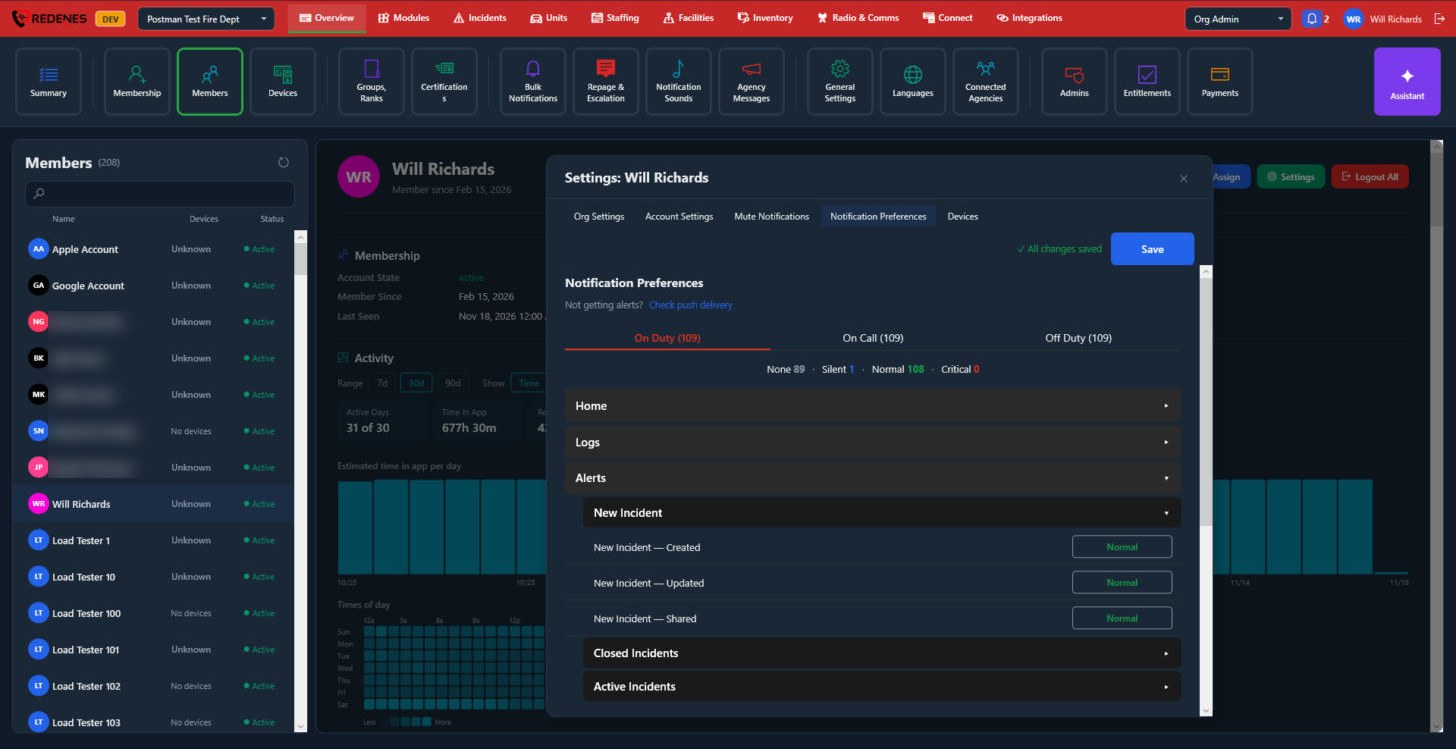 1234
- Check push delivery 1 opens a list of the member's devices that says, for each one, whether it gets this agency's alerts and, when it does not, every reason why in plain words. The same check is under the device list on the member's page.
- The three tabs 2 are On Duty, On Call and Off Duty. A member has a separate set of levels for each.
- The counts 3 show how many notifications are set to None, Silent, Normal and Critical on that tab.
- Open a section such as Alerts, then a module such as New Incident, to see each notification. The button on the right 4 is its level. Click it to change the level, then click Save at the top.
| Level | What the member gets |
|---|---|
| None | Nothing. |
| Silent | It arrives without a sound. |
| Normal | A normal notification with its sound. |
| Critical | Sounds even when the phone is silenced or on Do Not Disturb. |
To change levels for many members at once, use Bulk Notifications.
Devices
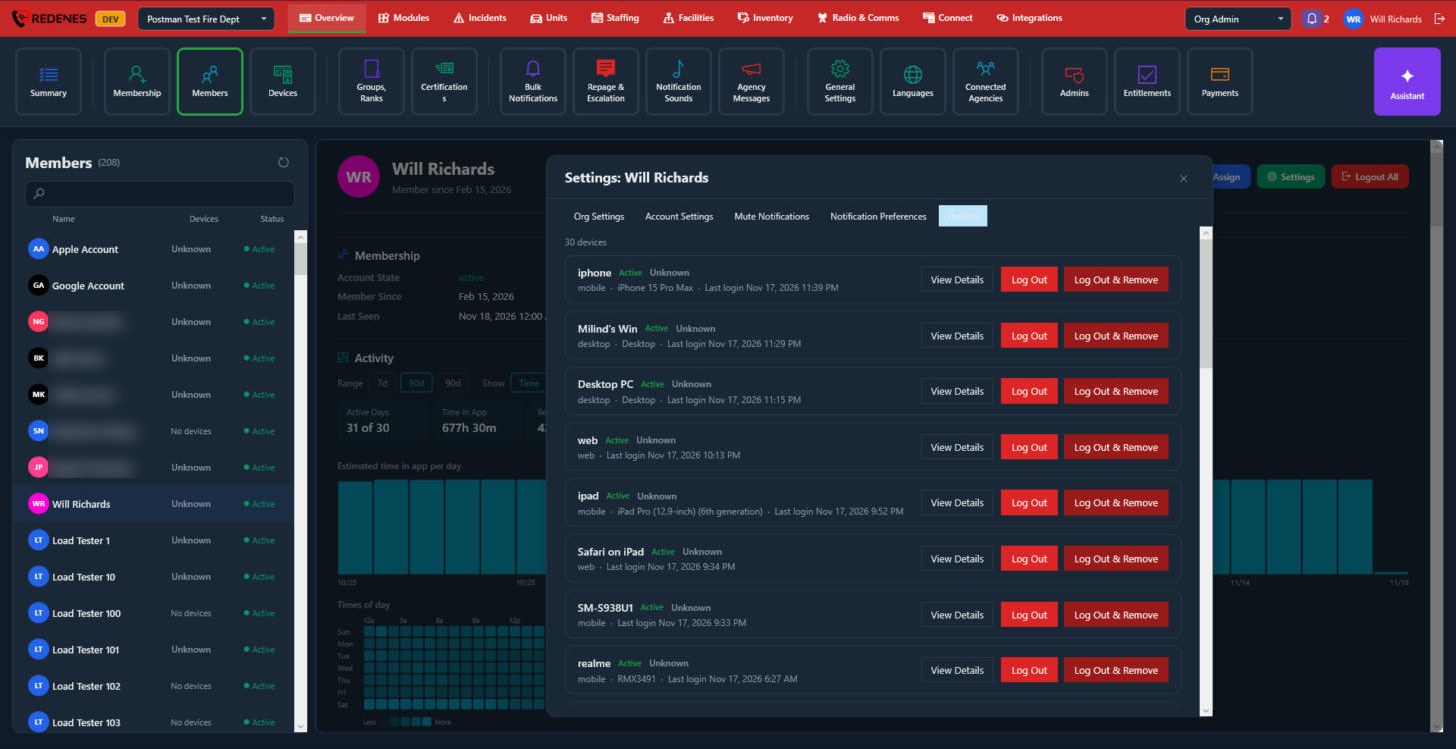 1
The same list and buttons 1 as the Devices part of the member's page.
Open the member, click Settings, then Notification Preferences and use Check push delivery. Then open View Details on their phone and look at Device Permissions. Between the two you can usually tell whether the phone is unreachable, notifications are switched off on the phone, or the level is set to None.